• Skip to main content
  • Skip to primary sidebar

I am a Honey Bee

All about my adventures with cooking, crafts, and travel

  • Home
  • About
    • About Me!
    • Press
    • Privacy Policy & Disclosures
    • Contact
  • Recipe Index
  • Exploring
    • Exploring- Florida
    • Exploring- Boston
    • Exploring- Cruises
    • Exploring- New England
    • Exploring- New York City
  • Resources
  • Disney Fun!

Ashton Woods

House Tour- Our Kitchen

July 16, 2017

They say the kitchen is the heart of the home and that is really true for us.

One of the reasons we fell in love with the house was the kitchen. We couldn’t get over how open it felt, even with the giant island. Oh, that island. I instantly fell in love with it when we saw a model home of this house design in January 2015.

It’s a 9′ long x 4′ deep island… that was more countertop than our previous kitchen, and that is just the island!

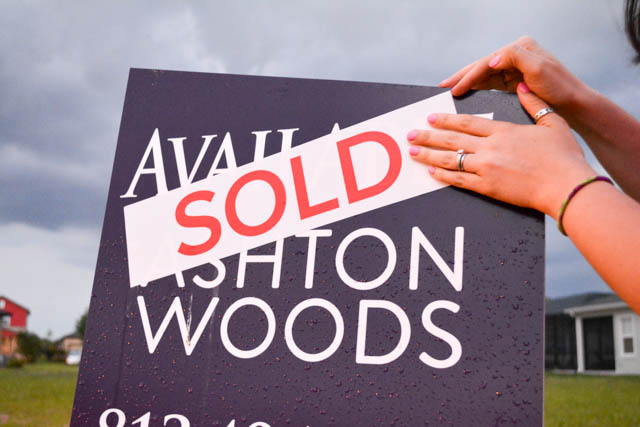
We were 99% sure on the house but still compared other house designs from other builders to the openness and layout of this design, prior to us signing the contract on a house. Ultimately, the Monroe model from Ashton Woods won out and we signed our contract in spring of 2016.

Then the real fun began… selecting options and finishes at the design studio.

I normally like white, white, white but when we saw the grey shaker cabinets of one of the kitchens in the design studio, we were hooked. It wasn’t a typical wood veneer finish and the grey was a great option on incorporating some color into the house, besides furniture and decor.

One thing I would not budge on was having white countertops. Our last kitchen has black ones it while the finishes of that kitchen worked together in that space, I hated the dark countertops. It was really tough to photograph process pictures for food recipes, and I just love the look of light countertops. I think they really help with making a space feel larger and brighter. (They look yellowish in the photos but it’s white- trust me, there is no way I would have picked anything else!)


The standard options for both the cabinet style and finish and countertops would need to be upgraded to achieve our desired look.

We picked a blend of upgraded cabinet styles for our kitchen. The grey shaker cabinets that are the majority of the cabinetry in the kitchen was a Level 6 (ouch… $$$), and the white shaker style was a Level 4 (not such an ouch!). Besides the color the biggest difference between them was the drawer style and construction of the door panels.

By blending the 2 cabinet styles we saved $513. The blend works as the white cabinets are only at the island and therefore are primarily visible in the kitchen work area, not particularly visible from the rest of the house, especially from the living room and backyard.

The standard countertop is granite, but the finish options they had were too dark and busy for our preferences. We had the option of upgrading to a composite material or marble. While marble is incredibly gorgeous, we opted for a composite as it was a fraction of the cost. I love how it is bright it is with a nice fleck pattern that is not distracting.

Our builder has a lot of options for cabinet styles to have a custom kitchen that you design to your design aesthetic and needs. Some builders do not have these options so this was one of the reasons we were drawn to them. I really appreciated the ability to customize the kitchen, even when the cost of some of these items we could customize was cost prohibitive.


One of the big things that I wanted to do in the kitchen was to remove the standard cabinet mounted microwave that was mounted above the stove for a microwave that was integrated into a base cabinet($130 add). This one thing great transformed our kitchen by having a hood installed over the stove. We were provided with a $1,458 for removing the 3 cabinets originally spec’d for the wall.

Then we further opened up the look of the wall by removing the cabinets on either side of the hood (receiving a credit for this) and installing floating shelves. The wood finished shelves we installed were from Threshold at Target. They are 4″ shallower than the grey shelves we could have installed at by the cabinet builder, but they only provided a flat price per shelf, so a 20″ long shelf would cost the same as a 8′ long one. We were not paying $468 per shelf that was less than 2′-0″ long! Hell no. So our $30 a shelves are working just fine for us.


In addition do those custom changes we added a tall filler panel next to the fridge and swapped out a base cabinet that came with doors for base cabinet that has drawers. We had wanted to do an integrated trash cabinet but the price exceeded our budget so we installed a pull out after we moved in.

The builder had plenty of options for backsplashes but the ones that we liked were very expensive (go figure!). We decided to leave the wall bare with just paint as we save up for a tile that we like. As well, we have the option of installing a pot filler above the stove as we have a pre plumbed for an utility sink in the garage, and it worked out that the location of that is almost directly behind the stove. So we don’t want to tile the wall yet, just to rip some of it out for the faucet.

The only architectural change we made in the kitchen was that we omitted the closet at the door that leads from the kitchen to the garage. We knew we wanted to put the pie safe there and the closet would not have allowed it. The pie safe works really well there as storage for our Pyrex and it’s a feature right at the entry that we use most often.

The walk in pantry is directly opposite the garage door so it makes dropping off groceries in there really easy.

One of the littlest things in our kitchen is one of my favorite things. We had an air switch installed for our disposal. This is a button that is intergrated into the counter that you press when you want to turn your disposal on and off. I like the look of this and I also like that I don’t need t open and close the cabinet below the sink to use a switch every time I want to use the disposal.

We had some issues with the install of the microwave cabinet  which still need to be adjusted by the millwork company, but the responsibility with scheduling them is in my court. Ya know, just been a bit busy lately with a newborn!

We sit at the metal stools and the table in the ‘Breakfast Area’ most often for meals, while our dining room gets used a bit less. As it is getting day to day use we wanted that to look homey and casual. We reused a table and a set of chairs that we had refinished that we had in Boston. I like how both our stools and these chairs are fun colors.

I found beautiful palm prints on Etsy from the WildBOOK store. We wanted something bold on the wall and these worked out perfectly. I had them printed at 24 x 36 and put them into simple white frames from IKEA.

The drapes we have on the slider are from IKEA and also add some fun color to the space. We layered 2 sheers using the VIDGA triple curtain rail system. The inner curtain is FLÖNG, a patterned sheer, and the outer one is AINA, a blue light weight linen. We use the same curtains and set up in our living room as well.

Also, like our dining room, we need a ceiling light junction box relocated. They centered the junction box for the light fixture centered in the space but we prefer the table to be centered on the wall with the palm prints instead. We removed the standard fixture and installed the really affordable pendant that I picked up on an Ikea run recently. The $30 JASSA pendant and the $10 wired SEKOND cord gives the area a more casual look which works well for the feel of the breakfast area that we are going for. When we have the junction box in the dining room moved, we will have this moved as well so that the light is centered over the table and then can hang lower above the table. But the $40 fix works for us now.

I also have high hopes of getting a fiddle leaf fig plant in the corner next to the sliding glass doors, but I am afraid it will feel too trendy and I’ll kill it. I’ll have to figure something out soon. Once I find a great pot for it I will be inspired to get a plant. I am looking for something modern looking. Totally open to suggestions!

____________________

Post contains affiliate links

Filed Under: Home Tagged With: Ashton Woods, Ashton Woods Monroe, custom kitchen, kitchen, kitchen design

Our House: Building Update #1

October 8, 2016

Throughout the process of building our house, I’ll give updates outlining the different stages of  construction and our experiences with them. 

____________________

our-house-building-update-1

Our house is under construction!!!!!!

We are so excited to be in the process of building it.

This first update spans a great deal of time, but future updates will be shorter in time and with more process. The beginning stages take some times as there is time for permitting, surveying, leveling the lost, framing the foundation, pouring it, etc. Once the house is framed the pace tends to accelerate (hopefully!).

So let’s begin!

Monday 4/25/16

Bought Our House

We signed the contract for our house!!!

In the following weeks we send emails to our designer, Ali, at the Design Studio asking about some finishes and pricing. We didn’t immediately make an appointment to select our finishes as we still were pricing out our options and we preferred to do that on our time, in private to discuss money without a designer there. We felt it would be beneficial to be more prepared at our design meeting.

While that was happening, an architectural firm was readying drawings to submit to the building department for review for a building permit

Wednesday 5/25/16

20160525_finsihes_02 20160525_finsihes_03

We met with our designer at the Design Studio to make our finish selections. (I will do more an in depth recap of that process)

20160525_finsihes_01

Wednesday 6/1/16

Our plans were submitted to the building department for permitting.

This process typically takes 30 business days for Hillsborough County, where we are building.

Thursday 6/9/16

Price dropped off the 30% check for the design options that we selected that was over our budgeted amount. This is due as we exceeded the original contract amount.

Wednesday 6/22/16

160622_graphics-review

We frequently checked the building department website to check on the status of our permit. We saw that the Graphics Review was now complete and being forwarded on to the plans examiner for their review.

Friday 7/1/16

160701-permit-denied

Our permit was denied! Ugh!

The comments and rejected plans are now going back to the architect to get updated and revised for re-submission.

While this is extremely disappointing as we wanted things to keep moving on, I have worked on plenty of projects that have permit comments. It’s a bummer, but it happens.

Thursday 7/14/16

160714_permit-resubmit

The comments causing the permit to be denied were addressed by the architect so now they are back in the building department for review.

Friday 7/22/16

160718_plan-review

We are really excited at this point as the plans have now been reviewed and approved. The next steps in the getting the permit in hand is under way!!!!

Thursday 7/28/16

160728_permit-granted

Our Permit was granted!!!

Tuesday 8/2/16

20160802_house-construction-meeting

We met with our project Manager, Chris Bernhardt, to review the process and estimated schedule of building our house. Chris was great to meet with as we did a great job at explaining the process to us. While we are well versed in architecture and construction, we are not that familiar with residential projects. Also, building in Florida is going to be different, in some ways, than what we are familiar with from growing up in the Northeast. There are different codes and practices that are here, like building is done on grade vs on basement foundation or that of a crawlspace (like what I grew up with).

Wednesday 8/10/16

20160810_house-pic_01 20160810_house-pic_02

Stopped by in the afternoon to check on progress. Nothing had been done to our lot, except for the flags being installed indicating underground utilities. The lot next door had their slab staked.

Friday 8/12/16

160812_taggart-house-changes-sign-off_pg1 160812_taggart-house-changes-sign-off_pg2

Signed off on 2 revisions to our electrical plan that we made during our 8/2 meeting with Chris. They were electronically sent back to our designer at the Design Studio to be officially added to the contract documents. (Make sure you get everything in writing!)

Saturday 8/13/16

20160813_house-pic_01 20160813_house-pic_02

Crews were working on our neighbor’s house (she got her permit before us). No progress on our lot.

Monday 8/15/16

Price stopped by after work and saw that our lot was scraped and leveled. As well the corners of the house were located, per survey.

Excited to see progress but questioning if the location of the corners are correct as they are so close to the black silt fencing.

Tuesday 8/16/16

20160816_house-pic_01

Price emailed our Project Manager asking about the location of the house as it appears to be so close to the silt fence (property line?) and the adjacent house.

Stopped by in the afternoon (2.30pm) to check on progress. No crews on site, but more slab framing had occurred.

20160816_house-pic_02 20160816_house-pic_03

I had a tape measure with me so I took some measurements of our house corners to the house next door. Verified that the location of the house was correct. The deceiving part is that the neighbor next door laid a brick walk off  from their lanai in their set back area. Their house and lanai are located right along their set back line (5′ from property line) so this through us off a bit.

Received an email (3.30pm) from our project Manager further explaining what I has just figured out while I was on site. Additionally, clarified that the silt fence is not on our property line, it was set further in.

Saturday 8/20/16

20160820_house-pic_01 20160820_house-pic_02

20160820_house-pic_06 20160820_house-pic_05

20160820_house-pic_03 20160820_house-pic_04

We stopped by the house to see if there was any progress since we had last been there on the 16th. During that time crews dug trenches for plumbing supply and drain lines.

Monday 8/22/16

20160822_160822_house-pic_01 20160822_160822_house-pic_02

This visit gave as a real peek at what plumbing lines go into the ground before the slab is poured. Plus, it was fun to space plan where things where as we could identify rooms where things where going, like our sink is in out kitchen island so I could stand there and pretend to see the living room and backyard from there.

20160822_160822_house-pic_04 20160822_160822_house-pic_03

We noted that a plumbing line and drain on our lanai was missing.

20160822_160822_house-pic_05 20160822_160822_house-pic_06

Tuesday 8/23/16

20160823_house-pic_01

We stopped by again to see how things were going at the site, in particular we were wondering if the missing plumbing for the lanai was installed- it still had not been.

We emailed Chris about this as we didn’t want to be in the position of having to chip out a brand new slab missing stuff that were always in the drawings. Of course, there are inspections, but I have been on plenty of job sites when things have been missed.

20160823_house-pic_02 20160823_house-pic_03

Wednesday 8/24/16

Price stopped by after work to check on things and saw that they had the plumbing for the lanai installed!

Thursday 8/25/16

The plumbing passed inspection and the vapor barrier had been laid down in preparation of pouring the slab.

Saturday 8/27/16

20160827_house-pics_01 20160827_house-pics_02 20160827_house-pics_03 20160827_house-pics_04

We stopped by the house at 8.30 am to check on the crew pouring the slab. It was exciting to pull up to the house and see 4 concrete mixing trucks right out front of our lot!!

We left shortly after 9 to head back home and get on with our day. They were still hard at work pouring concrete.

Sunday 8/28/16

20160828_house-pics_01 20160828_house-pics_02

We were expecting to see the crew again hard at work but they actually wrapped up the day before!

It was so wonderful to see the smooth slab. We had wanted to stick our hands into it while it was wet but it was well worth missing out on that to have the slab done.

The next step is to wait for the delivery for the Concrete Masonry Units (CMU), aka block,  for the first floor block walls.

Tuesday 8/30/16

Emailed Chris requesting a project update and the next steps as we saw that the block, had been delivered to the house.

As well, we asked him about the landscaping for the property. It’s a long way away but we were curious to know what plans are included for our property (it varies by building and by house design) and the general layout. We are interested in knowing what would be included since there are plants that we do/don’t want and we want to clarify with the landscaper where we will plan on installing a fence.

Wednesday 8/31/16

G:Waterset50 interiorWaterset 50 interior Option 2Waterset 5

Received an email from our Project Manager saying that we just need to wait out the storm to get started- totally understandable.

Chris also included an example landscaping plan and plant list. The plan is not site specific so they would need to make adjustments for our house and the lot (pie shaped). While there is a list of plants on the plan, he clarified that the plants do depend on what the nursery has on hand (due to season and stock). (Good, since we dislike most of them. ha!)

Thursday 9/1/16 Through Monday, 9/5/16 (Labor Day)

Hurricane Hermine and Labor Day Weekend really-wrecked havoc on our schedule. The storm prevented the crews from working on the block walls for the first floor of the house. And then it was Labor Day weekend.

On top of that, the geniuses that delivered the block on site on 8/30 also brought bags and bags of cement, which got ruined by all the rain that fell. So we needed crews to free up and more supplies to get delivered to the site.

Tuesday, 9/6/16

Price emailed our Project Manager Chris (4.30pm) to let him know that we had been by on Saturday and Sunday, the 3rd and 4th, to see if there was any progress (there was none) and to bring to his attention all the cement that has been ruined. Additionally, we wanted to confirm that the lanai has a gas line, as we didn’t see one next to the plumbing.

Chris promptly responded at 5.15pm that he will remind the block installers that the cement is ruined. He also clarified for us that gas line is run later in the project.

Friday, 9/9/16

20160909_house-pic_01 20160909_house-pic_02

20160909_house-pic_03 20160909_house-pic_04

I stopped by after work to check on progress at the site, the block crew was working on the neighboring house. This was great since we had to wait a bit for crews to be available again since the schedule got all messed up from the storm and holiday weekend. I had a quick chat with one of the guys on site and he said they would be starting on our house on Saturday and it should be done by EOD Monday.

Saturday, 9/10/16

When we did a quick drive by the site mid-morning, we didn’t see any action yet on our house. The crew was next door working.

Sunday, 9/11/16

20160911_house-pic_01

Since the crews had worked on past weekends, we stopped by to see if they were working. Unfortunately, they were not, but it gave us a chance to walk around and check things out since they did start on our house…

20160911_house-pic_02 20160911_house-pic_03

Our excitement was quickly washed away when we were walking around the site and I noticed some trash stuffed in one ofthe blocks. I grabbed it and discovered it was a half eaten pulled pork sandwich. Then we noticed beer bottles in the walls.

20160911_house-pic_04 20160911_house-pic_05

We began the process of walking around the site to see what else we could find.

20160911_house-pic_06

In the end we pulled out about 20 empty and almost empty bottles of Corona from the block walls.

20160911_house-pic_07 20160911_house-pic_08

Food was also found in the piles of block that were set up in staging areas around the site. While those could have been cleaned up later on as they grabbed those blocks to use them, they clearly had no intention of cleaning up the bottles in the various walls. Assholes.

We emailed the team about this at 1pm explaining what we saw with pictures. We tried to keep it up beat but clearly we were pissed off, frustrated, and hurt that people would disrespect us and our house this way.

We got calls and emails from the team but I still stopped by the show house later on (around 5pm) in the afternoon and spoke with Renee to confirm that we didn’t want a new crew, which would cause a delay in schedule, but a supervisor watching over the crew would be acceptable. She apologized for the behavior of that crew as we discussed what happened while reviewing photos. (I spoke with Chris the following day and he apologized repeatedly as well.)

 20160911_house-pic_09 20160911_house-pic_10

I then went back to the house to get out more bottles with a grabbing tool. I was able to get all but 2 broken bottles.

Monday, 9/12/16

20160912_house-pic_1

20160912_house-pic_2 20160912_house-pic_3

Stopped by the house on my way to work to check on things. A crew was there and a supervisor was there with them.

Then my dad stopped by later on in the day and snapped a few pics of the crew working.

Tuesday, 9/13/16

The lintel of the house (the top 2 tiers of block of the first floor) are getting filled today.

Wednesday, 9/14/16

20160914_house-pic_01

My dad stopped by and snapped a few picture so we could see the progress of the block being done!

___________________

I am stopping this recap at this point to capture the competition of the block. My next update will be about the framing of the interior and exterior walls.

While there have been some schedule delays and issues with a crappy crew, we are so excited that our house is underway. The Ashton Woods team that we have been working with has been great and attentive along the way.

We are looking forward to the next steps of the process.

Filed Under: Home Tagged With: Apollo Beach FL, Ashton Woods, Ashton Woods Monroe, building our house, house, Waterset

Picking out our new house!

August 1, 2016

Picking out Our New House

As we are in the processing of building our house, I figure I should recap what we have done already.

Let’s begin with picking out our house!

monroe tanglewood

This whole thing started last January of 2015 when my Dad picked up Price, me, and Autumn from our Royal Caribbean cruise. He suggested that we stop by a new development to check out a model house. Ugh, I was so not in the mood. I just wanted to get back to his house to get settled so that Autumn could have lunch and then take a nap so I could take a break to put my feet up. I like keeping to a schedule so this was messing things up! But he was steering the car so I had no choice!

Thankfully, he brought us there since we walked into the Monroe by Ashton Woods and FELL IN LOVE.

Monroe kitchen

We had already talked about moving South to get out of the cold, out of the more costly Northeast, but this house basically sealed the deal for us when we were toying around with the idea of moving to Tampa. It was a great house at a great place so it hooked us. Our original plan: Move by Spring 2017.

We then returned to Boston and it didn’t stop snowing for the next 6 weeks or so, which made us decide on moving to FL sooner than later. We then notified our offices that we planned on moving and were hoping for transfers to our Tampa offices.

Waterset FL_05

Later in September we came down to look into more developments, builders, and houses. I also interviewed and arranged my transfer. Plus, it was Price’s birthday, so it was a busy trip for us!

Waterset FL_01 Waterset FL_02

Waterset FL_03 Waterset FL_04

We looked at a different development than what we saw the previously winter. We first saw it in a small community called Tanglewood Preserve in Gibsonton, but we then heard about Waterset, in Apollo Beach, FL (where my dad lives).

Waterset had significantly more builders, home styles, and much more in terms of amenities. It was going to be a very large, phased development so we had options on where to pick a home site. The development was located along 2 major roads to take you into Tampa, or south towards Naples, so it made commuting pretty easy.

Sandpiper Cal Atlantic Waterset

We were even more set on The Monroe in Waterset at this point but explored the Sandpiper I from Cal Atlantic.

Price and I really liked the house elevation, features, possible upgrades, and price, so we started to explore our options with that builder. We marked up the floor plan with things that we wanted priced out to figure out what options were available and for that cost.

Note: They currently only offer Sandpiper II, but it’s the same elevation as Sandpiper I, with a different floor plan, which we liked 100x more. So if you like that plan, ask and see if it’s do-able.

Sandpiper floor plan_taggart

It was fantastic working with Cory Day, but ultimately we decided that the house was too small for us (we really wanted a 4 bedroom plus an office) and we didn’t like the size of the lots available for the house, while the locations in the community were great.

Life continued on in Boston until we sold out house and moved down into my Dad’s house in Feb/March of 2016.

Again, Price and I looked at other developments, builders and homes to make sure we were going in the right direction.

Verona Homes by West Bay Waterset Model

We did fall in love with The Verona by Homes by West Bay in Waterset. The size (5 bed / 4 bath / 3 car / 3,518 Square Feet) and floor plan were great, plus the ‘Craftsman’ elevation was just so beautiful. But about 100K over our budget (Starting from $352,990, plus structural and finish upgrades). OUCH!

verona_1st floor

Verona- First Floor

verona_2nd floor

Verona- Second Floor

So again, we are set on The Monroe (starting at 263K), and we’re planning on moving forward.

Then my Dad comes across the Lucaya Lake Club development that features homes by Ryan Homes.

lucaya lake_FL_01 lucaya lake_FL_02

We checked it out and liked the private Lakeside part of the development. The homes there were very close to the amenities and the lake the development would continue to wrap around. This was an 11K upgrade, which included a paver driveway vs. a standard concrete one. Yes this is a lot of money, but even including that the house was in our budget.

There was the Esterto Bay model home there that we got to check out. It was a beautiful. We started to fall in love with that house as well.

estero bay_01 estero bay_02

estero bay_03 estero bay_04

At this point we really started to break things down between the Monroe from Ashton Woods in Waterset to the Estero Bay by Ryan Homes in Lucaya Lake Club.

We liked both plans and the elevation options available.

estero bay 1st floor

Estero Bay- First Floor

estero bay 2nd floor

Estero Bay- Second Floor 

We really liked the overall layout of the house, with all the bedrooms on the 2nd floor and the layout on the first floor. The amount of windows in the house made it feel really open and bright.

Also, we like that it came with a 3- car garage as standard feature. The more and more that we talked with people that was the #1 complaint about their house as there is limited storage in homes and they will up their 2 car garages with stuff and then have no room to park.

We had little changes to make to the plan, but everything did seem like it had to go through approvals, BUT only after we signed a contract, and we didn’t like that approach. For example, I wanted the kitchen island rotated toward the family room and we couldn’t get a commitment on that prior to signing a contract. Also, no changing to the master bedroom tray ceiling- we didn’t like the shape.

Monroe_FL1_upgrades

Monroe- First Floor 

Monroe_FL2_upgrades

Monroe- Second Floor

We loved the layout of the house from the moment we walked into it in January ’15.

We did select several options (in highlighted color) to customize it per our liking. The biggest thing is that we filled in the 2-story space to make a big bonus room, and made the as scheduled loft space the 4th bedroom.

There are 4 options for elevations for the house and we picked the one with the full front porch, as we liked that a lot. We wished that we could have merged some elements from the other options, but the elevations are pretty set in stone as they are approved by the architectural review board for the community.

So what made us pick the Monroe?

We made a pro and cons list for the houses and communities to help us figure out the different aspects of the houses we liked. It helped us really evaluate the various aspects of the homes, communities, costs, goals, etc.

Here goes some of the items on our list…

Community…We liked that the Estero Bay was in a gated community, but it didn’t have the amenities we really liked at Waterset.

Options… There were more things that we could customize with the Monroe, while their option were $$, we liked that we had options. The kitchen shown was the kitchen you get for the Estero Bay, you could not really customize the kitchen.

Storage… both provided great storage with having 3 car garages (*Monroe shown does not have a 3 car garage but they still had the option when we chose our house and one lot left that would fit it. It is side by side by side, not tandem like that Estero Bay. Photos to come). We liked the layout of the Monroe just a bit more.

AC… The Estero Bay home has 2 units, compared to the Monroe’s 1 unit (the Monroe unit does split between upper floor and lower floor and has two thermostats, we have yet to experience it)

Lots… There was only 1 lot that could accept a Monroe with the 3rd car garage add on, but it was a fantastic lot right at a park. So nice to open up our front door and walk right outside into a park. The 2 lots available for the Estero Bay with the Craftsman style elevation where not that desirable for us.

Smooth walls… yeah this might sound silly, but we could select an upgrade for smooth walls with the Monroe, while the Estero Bay did not have that option nor would the builder entertain the idea of pricing that out.

Money… We stalked, err checked the Ashton Woods websites for updates, changes, and additions for a year before we found that the last few lots were not selling.  We later found that Ashton Woods was temporarily leaving the community post-Phase 3 construction so selling their last few lots would be more desirable for them. Ryan Homes at Lukaya were selling like crazy so bargaining with Ryan Homes would be difficult.

Bought Our House

So what were we to do?!?!?!

We went with out guts and picked the Monroe.

(Price hems and haws at things, while I come to decisions faster so I had to pull the finger guns out to make him blurt it out without thinking for-ever! ha!)

We signed our contract at the end of April and now we are abut to begin building and we will get settled before we know it. It is going to be so fantastic!!!

__________________

Stay tuned for more updates on our home building process!


Filed Under: Home Tagged With: Ashton Woods, building a house, Cal Atlantic Homes, Homes by West Bay, Ryan Homes, spec house, Waterset

So, we bought a house!!!

April 25, 2016

Bought Our House

We signed the paperwork tonight for the house that we are going to build!!!

Bought Our House_01 Bought Our House_02

Bought Our House_03

We are so very excited about this!!!!

This has been in the works for a long time so we are glad it’s finally to this point!!!

Bought Our House_04 Bought Our House_05

Bought Our House_06

The next 6 months will be filled with finish reviews, sit downs with the lead contractor, site visits, and much more until the house is all done. We are looking forward to all of it.

Bought Our House_07 Bought Our House_08

Bought Our House_09 Bought Our House_10

Bought Our House_11

There is a park right next to us! Perfect for the whole family, including the dogs!

Bought Our House_12 Bought Our House_13

Bought Our House_14

See you in November Park Strand Drive!!!

Filed Under: Home Tagged With: Ashton Woods, bought a house, new house, Waterset

Primary Sidebar

EMAIL NEWSLETTER!

Sign up HERE for meal planning suggestions & tips to take a great trip!

Top Posts & Pages

  • Chocolate Chip Pudding Cookies
    Chocolate Chip Pudding Cookies
  • Meghan Markle's Zucchini Pasta Sauce
    Meghan Markle's Zucchini Pasta Sauce
  • Easy Pepperoni Pizza Roll Ups
    Easy Pepperoni Pizza Roll Ups
  • Room Review: Cars Family Suite in Disney World's Art of Animation Resort
    Room Review: Cars Family Suite in Disney World's Art of Animation Resort
  • Southwest Orzo Salad with a Cilantro Lime Vinaigrette
    Southwest Orzo Salad with a Cilantro Lime Vinaigrette
  • New Haven Style White Clam Pizza
    New Haven Style White Clam Pizza
  • Pistachio White Chocolate Chip Pudding Cookies
    Pistachio White Chocolate Chip Pudding Cookies
  • How To: Labeling Your Garbage Cans
    How To: Labeling Your Garbage Cans
  • The Ultimate Weekend Away Packing List for Babies and Toddlers
    The Ultimate Weekend Away Packing List for Babies and Toddlers
  • Churro Waffles with Dulce De Leche Whipped Cream
    Churro Waffles with Dulce De Leche Whipped Cream
collage of recipes of common ingredients
collage of soup stew and chilis bowls

Follow Us

Copyright© 2023 · Brunch Pro Theme by Feast Design Co.


Loading Comments...
 

You must be logged in to post a comment.