• Skip to main content
  • Skip to primary sidebar

I am a Honey Bee

All about my adventures with cooking, crafts, and travel

  • Home
  • About
    • About Me!
    • Press
    • Privacy Policy & Disclosures
    • Contact
  • Recipe Index
  • Exploring
    • Exploring- Florida
    • Exploring- Boston
    • Exploring- Cruises
    • Exploring- New England
    • Exploring- New York City
  • Resources
  • Disney Fun!

Uncategorized

Pecan Snowdrops

December 13, 2009

Pecan Snowdrops, more commonly known as Mexican Wedding Cookies, are my favorite Christmas time cookie. They are nutty, buttery, sugary, and bite size! They are as easy to make as they are to eat. I use a great Christmas cookie book, fittingly called The Christmas Cookie Book, by Lou Seibert Pappas. It breaks down different types of cookies into chapters from timeless traditional, family favorites, cookies for gift giving and mailing, and elegant party cookies. These cookies fall under the gift giving and mailing chapter since they can ben stored in an airtight container for 2 weeks, that is if they last that long!

Price and I made a BIG batch (4x the typical recipe) on Friday night for a Cookies Exchange we hosted through our Meetup group. It was a lot of fun, a good break from the madness of finals, and we met a bunch of great people who brought some really great cookies.

100_6727 100_6728 100_6730 100_6732

Pecan Snowdrops

Makes about 3 dozen

Ingredients

  •  3/4 cup butter, at room temperature
  • 1/3 cup powdered sugar
  • 1 teaspoon vanilla extract
  • 1 1/2 cups all purpose flour
  • 3/4 cup finely chopped pecans or toasted, skinned hazelnuts (finely chop the nuts or run the through a food processor)
  • Powdered sugar for Dusting

Process

  1. Preheat the oven to 325 degrees F.  Lightly grease baking sheets or use nonstick or parchment-lined baking sheets.
  2. Using a stand mixer or a large bowl and a handheld electric mixer, cream the butter and sugar together until light and fluffy.  Add the vanilla, salt, flour and nuts and mix well.  Roll the dough into ¾ inch balls between your palms, and place on prepared baking sheets, spacing them about 1 ½ inches apart.
  3. One sheet at a time, bake the cookies for 15 to 18 minutes, or until light brown.  Transfer to rack to cool slightly.  Place the still-warm cookies on a sheet of parchment paper or aluminum foil and heavily dust with powdered sugar shaken through a sieve.  Let cool completely.
  4. Store the cookies in an airtight container for up to 2 weeks

Filed Under: Uncategorized Tagged With: Christmas Cookies, cookies, food and drink, Mexican Wedding Cookies, Nuts, Pecan Snowdrops, Pecans

Pumpkin Whoopie Pies with Cream Cheese Frosting

November 18, 2009

I had never had a whoopie pie before (I don’t count that gross package one I tired-yuk) until I made them this weekend with Pricer. I really did not see the appeal in them since they are like a cake sandwich. Can’t you just make a cupcake? Well, I’m still not sure what the big difference is between whoopie pies and cake and cupcakes so I’ll just go with it. You can read about Whoopie Pies here.

I was attracted to making whoopie pies because it was something new to me and I knew I could do pumpkin ones so they would go with the season.  I found a good recipe on Martha Stewart that was from Baked Bakery in NYC. I love the pumpkin cream cheese muffins they have at Starbucks so I was excited to see the recipe has a cream cheese frosting.

Price helped me make them (see below!) so it made the process even more fun. It was a simple recipe with a good result. Our whoopie pies are not smooth like the ones pictured so I’ll have to figure that out next time. I would think it would have to how much it was whisked but Price did that really well for a while so it might be the overall density, or the humidity, or our convection oven. They could have been more pumpkin-y for me- maybe I could try some pumpkin pie spice to replace the spices in here, or add more ginger (I love ginger). The recipe said that we would have 12 whoopie pies but our ice cream scoop was much smaller than the one suggested so we ended up with about 25. At least I don’t feel so guilty having one since they are like 3 bites. I made them on Saturday night so they were still really fresh when my dad came up on Sunday and I was able to give him some. 🙂

Pumpkin Whoopie Pies with Cream Cheese Frosting

FOR THE PUMPKIN WHOOPIE COOKIES
3 cups all-purpose flour
1 teaspoon salt
1 teaspoon baking powder
1 teaspoon baking soda
2 tablespoons ground cinnamon
1 tablespoon ground ginger
1 tablespoon ground cloves
2 cups firmly packed dark-brown sugar
1 cup vegetable oil
3 cups pumpkin puree, chilled
2 large eggs
1 teaspoon pure vanilla extract
FOR THE CREAM-CHEESE FILLING
3 cups confectioners’ sugar
1/2 cup (1 stick) unsalted butter, softened
8 ounces cream cheese, softened
1 teaspoon pure vanilla extract
 

Make the cookies: Preheat oven to 350 degrees. Line two baking sheets with parchment paper or a nonstick baking mat; set aside.

In a large bowl, whisk together flour, salt, baking powder, baking soda, cinnamon, ginger, and cloves; set aside. In another large bowl, whisk together brown sugar and oil until well combined. Add pumpkin puree and whisk until combined. Add eggs and vanilla and whisk until well combined. Sprinkle flour mixture over pumpkin mixture and whisk until fully incorporated.

Using a small ice cream scoop with a release mechanism, drop heaping tablespoons of dough onto prepared baking sheets, about 1 inch apart. Transfer to oven and bake until cookies are just starting to crack on top and a toothpick inserted into the center of each cookie comes out clean, about 15 minutes. Let cool completely on pan.

Make the filling: Sift confectioner’ sugar into a medium bowl; set aside. In the bowl of an electric mixer fitted with the paddle attachment, beat butter until smooth. Add cream cheese and beat until well combined. Add confectioners’ sugar and vanilla, beat just until smooth. (Filling can be made up to a day in advance. Cover and refrigerate; let stand at room temperature to soften before using.)

Assemble the whoopie pies: Line a baking sheet with parchment paper and set aside. Transfer filling to a disposable pastry bag and snip the end. When cookies have cooled completely, pipe a large dollop of filling on the flat side of half of the cookies. Sandwich with remaining cookies, pressing down slightly so that the filling spreads to the edge of the cookies. Transfer to prepared baking sheet and cover with plastic wrap. Refrigerate cookies at least 30 minutes before serving and up to 3 days.


Filed Under: Uncategorized Tagged With: pumpkin, whoppie pie

Vanilla Extract

November 6, 2009

IMG_0569

I made my first batch of vanilla extract this spring and I’m hooked. I can taste the difference between homemade compared to store-bought. It tastes so much fresher and I love how I can add vanilla seeds to my recipes once I give the extract a good mix. I really love seeing specs of vanilla in whipped cream.

I decided to make more vanilla extract to give as Christmas gifts. Vanilla extract takes about 2 months before it is ready to use to if you want to give it out as gifts start asap. I started my extract on 10/17 so I will have plenty of time to get it all ready for Christmas. If I did not do it then I would have forgotten about it and then I would be out of luck to give the extract as gifts.

IMG_0566

When I made my first batch this past spring I used rum since I had it on hand at that point. I think that the extract was good but the rum was quite strong for an extract. I used vodka this time since vodka has no scent, which I like because it won’t compete with the scent of the vanilla.

IMG_0568

I suggest that when you purchase your vanilla beans you use Madagascar vanilla beans because they have a smooth flavor which translates well for extract. They are also known as Bourbon vanilla beans because the French first planted the orchid vines on Isle de Bourbon.  Mexican vanilla beans might have the flavor but some manufactures add coumarin, which is banned by the FDA because it can cause liver and kidney damage.  If you decide to use Mexican vanilla beans or products please use a reputable manufacture. While Tahitian vanilla beans can be used for extract they are not as flavorful compared to other varieties. They are more aromatic, so they are better for scent applications as opposed to baking.

I have purchased my beans from Vanilla Products, a store on ebay. I like how they are a high rated seller and offer different types and quantities of vanilla.

Don’t forget to get a good vodka/rum! You cant have a good vanilla and a crap vodka and  expect great results.

 IMG_0696

Vanilla extract- about 3 weeks

Vanilla Extract

8oz of vodka or light rum
3 vanilla beans
 

Pour 8oz of liquor into a glass container.  Split and open the vanilla beans. You can scrape the beans to loosen the seeds. Place vanilla beans into the liquor. Store in a cool dark place for 2 months.

*I purchased these glass containers from the Container Store.

Filed Under: Uncategorized Tagged With: Vanilla

Monkey Bread

October 9, 2009

Over 4 years ago Price and I spent Memorial Day Weekend in Rockport, MA. We stayed at the Sally Webster Inn, a cute B&B that is walking distance to the historic district. While there we had this sweet, sticky, yummy breakfast… it was the first time we ever had Monkey Bread. We had never heard of it before so we eagerly asked what it was and how to make it. Our inn keeper told us how simple it was to make so we decide that we must try it at home later on. I have made it several times since but I don’t typically make it at home since it makes a lot, I have even cut it in half when we have had a few people stay over and it is a lot. Plus, let’s be honest, it’s not really healthy…. you’ll see.

Every friday my office has this thing called Pod Breakfast. It just means that 1 person brings in breakfast for our different pods (sections of open workstations). So today is my turn for Pod Breakfast. Since I started working at Gensler 3 years ago Sept I have made Monkey Bread for all but 1 of my turns. I’m kinda sad that I missed that one but I know at the time I correctly choose sleep over getting up early to bake.

I make Monkey Bread and either make something else or purchase something else. I have done everything from a large fruit salad to McDonald’s breakfast sandwiches. So I had to decide what my other item would be… since we just made waffles last weekend I had that on the brain and settled on that. I got up at 6 this morning (luckily I did not snooze for 30-40 minutes like usual) and went to the grocery store to get all the supplies I would need for monkey bread and buttermilk waffles.

Making the monkey bread was easy, like usual, and prepping for the waffles was a breeze however I put the eggs in the fridge and forgot them at home. Damn! I was so annoyed since I had to run out to the closest convenience store to get eggs. Just another thing to juggle this morning. The big scheme it was not a big deal since I made 3 batches of waffles but it slowed me down at the start. Once I got going everything went smoothly- I think I ended up making 45+waffles- which were served with syrup, strawberries, and whipped cream. I sent up a table for the monkey bread and the waffle prep. The monkey bread was a hit since it is a sugary, buttery, sweet breakfast bread. I felt bad that I forgot to invert it since I was so busy with the waffles but it was still good. Inverting the monkey bread allows the buttery ‘caramel’ to sink back into all of the pieces.

Monkey Bread

4 pack of buttermilk rolls (I use Pillsbury)
1/2 cup of granulated sugar
1/2 cup of brown sugar
1 1/2 tablespoons of cinnamon
1 to 1 1/2 sticks of butter (depends on if your heart/hips can take it)

pre=””>Preheat the oven to 350. Use a bundt pan or a loaf pan for the monkey bread. Spray with nonstick cooking oil.

In a large bowl mix the sugars and cinnamon together.

Using clean, sharp kitchen scissors cut every roll into 4 pieces.

While you are cutting the pieces melt the butter.

Roll all pieces in the cinnamon sugar mixture until coated. Place all pieces in the pan. Pour the butter overall the pieces. Cook for 30 minutes. be sure to check on the monkey bread so it does not brown to quickly. Invert the monkey bread onto a plate, serve warm.


Filed Under: Uncategorized Tagged With: breads and muffins, breakfast, cinnamon, monkey bread, sugar

Green Tomato Bread

September 22, 2009

This past weekend has been a blur! Price and I went out on Friday night for Brazilian BBQ with a meetup group. On Saturday morning Emily and I went to see “Cloudy with a chance of Meatballs” … in 3D…. on IMAX. Then I spent the afternoon ripping apart the kitchen. I purged some stuff and brought in a shelving unit to put my cookbooks on. So a lot of things shifted around but I think it works a lot better. Then we slept in on sunday, I went to my site for homework, birthday lunch with Pricer, and then lots of baking and cooking. So the next couple of posts will be about food and recipes, then I’ll get back to scrapbooking and random things.

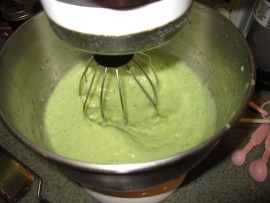
My boss told me that during a recent trip she had green tomato bread. Being that my tomato plants halted their ripening I figured this would be good way to use them up, besides fried green tomatoes. I found a recipe that looked pretty good so I figured it would be worth a try. I’m so glad she told me about Green Tomato Bread and that I actually tried it. I made 2 kinds- lime and chocolate chip- and both came out really well. I never would have thought of using green tomatoes in a bread but it keeps the bread moist and gives it a sweet tomato flavor throughout. I think the lime zest (approx 1 T) brings a sweet tang to the bread. I used 2 cups of chocolate chips, which I think is a bit much but it still tastes pretty good.

Green Tomato Bread

3 eggs
1 C. oil
2 C. sugar
2 C. Green Tomato Puree (small amount of water if needed)
1 T   Vanilla
3 C.  Flour
1/2 tsp salt
2 teaspoons baking powder
1 C.  chopped walnuts (optional)
1 C.  raisins (optional)

Preheat oven to 350. Grease and flour 2 9×5 loaf pans. Puree the green tomatoes, add water if needed. Sift the dry ingredients together, set aside. Beat the eggs, oil, and sugar until well incorporated.  Add in the green tomato puree and vanilla.  Add  in the dry ingredients, beat until well incorporated. Gently fold in the nuts and/or raisins, if desired.  Divide batter evenly and pour into pans.  Bake at 350° for 45-60 minutes.

Other ideas for mixins:

Mini choc. chips (I suggest 1 1/2 cups, max)
Pecans
Cranberries
Lime zest (I used 1T)

TIP:

Freezing the puree ahead of time will save you from having the green tomatoes ripen on your counter top while you wait for the spare time to make this treat.   If you freeze the puree in 2 cup quantities it will be pre-measured and ready to go for a batch of bread.


Filed Under: Uncategorized Tagged With: breads and muffins, green tomato bread, tomatoes

  • « Go to Previous Page
  • Go to page 1
  • Interim pages omitted …
  • Go to page 10
  • Go to page 11
  • Go to page 12

Primary Sidebar

EMAIL NEWSLETTER!

Sign up HERE for meal planning suggestions & tips to take a great trip!

Top Posts & Pages

  • Easy Pepperoni Pizza Roll Ups
    Easy Pepperoni Pizza Roll Ups
  • Chocolate Chip Pudding Cookies
    Chocolate Chip Pudding Cookies
  • Room Review: Cars Family Suite in Disney World's Art of Animation Resort
    Room Review: Cars Family Suite in Disney World's Art of Animation Resort
  • Lemony Raspberry Zucchini Bread with a Lemony Glaze
    Lemony Raspberry Zucchini Bread with a Lemony Glaze
  • Quick and Easy Cabbage Slaw
    Quick and Easy Cabbage Slaw
  • Meghan Markle's Zucchini Pasta Sauce
    Meghan Markle's Zucchini Pasta Sauce
  • Strawberry Dessert Cookie Pizza
    Strawberry Dessert Cookie Pizza
  • Pasta with Shrimp, Corn, Tomatoes, and Zucchini
    Pasta with Shrimp, Corn, Tomatoes, and Zucchini
  • New Haven Style White Clam Pizza
    New Haven Style White Clam Pizza
  • 15+ Tips & Tricks for Enjoying Mickey's Not So Scary Halloween Party
    15+ Tips & Tricks for Enjoying Mickey's Not So Scary Halloween Party
collage of recipes of common ingredients
collage of soup stew and chilis bowls

Follow Us

Copyright© 2026 · Brunch Pro Theme by Feast Design Co.

Loading Comments...

You must be logged in to post a comment.