• Skip to main content
  • Skip to primary sidebar

I am a Honey Bee

All about my adventures with cooking, crafts, and travel

  • Home
  • About
    • About Me!
    • Press
    • Privacy Policy & Disclosures
    • Contact
  • Recipe Index
  • Exploring
    • Exploring- Florida
    • Exploring- Boston
    • Exploring- Cruises
    • Exploring- New England
    • Exploring- New York City
  • Resources
  • Disney Fun!

Pies and Tarts

Frozen Samoa Cookie Pie

March 14, 2014

Frozen Samoa Cookie Pie

It is finally going to be nice out tomorrow so we are going to test drive some cars!

I feel like I’m betraying our other car. Ahh poor Frank the Tank.

Frozen Samoa Cookie Pie-1

But Frank is just too small now. Not in the ‘we have a new baby and have tons of stuff small’ but ‘we have a new baby and no one can sit in the passenger seat now because of the car seat’ small. Yep, that’s what happens when your Scion Xa is the size of a matchbox car. It means with the car seat in the back you can’t sit in front. Well, you can but then your knees are touching the dashboard and that’s not the safest thing.

Now we are getting a new car so that it doesn’t mean that one of us is playing chauffeur.

Thankfully, Frank has been paid off for years so he is sticking around and will be the car we use when we are just running errands. I can’t ditch Frank yet! He only has 115K miles under the belt and he has plenty more in him!

Frozen Samoa Cookie Pie-4 Frozen Samoa Cookie Pie-5

Frozen Samoa Cookie Pie-6 Frozen Samoa Cookie Pie-7

Tomorrow we are looking at a Mazda CX5 and then next weekend we are going to check out a Toyota Rav4. Price has done endless research on endless models of cars and they are our top 2 cars.

Truthfully, I’m a bit nervous to test drive cars because I’m so used to how mine handles and this time we are going to get an automatic (for various reasons). Aside from rentals, I’ve only ever driven standard cars and when I drive automatics I tend to drive with 2 feet. I’m sure the sales guy is gonna love it…

Frozen Samoa Cookie Pie-8 Frozen Samoa Cookie Pie-9

Frozen Samoa Cookie Pie-10 Frozen Samoa Cookie Pie-11

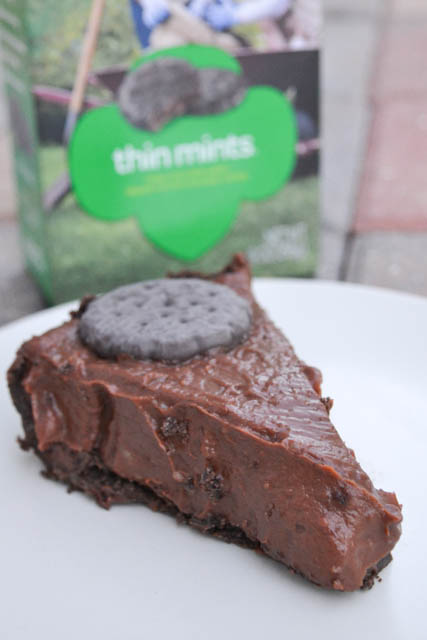
Anyway, today is Pie Day here on the blog and Pi Day! #doublepieday

So I made this doozy of a pie for the occasion. This Frozen Samoa Cookie Pie is what happens when you stuff some Samoa Cookie pieces in and on a Cool – Whip based pie. And don’t forget the added coconut, caramel, and chocolate that is in and on the pie too!

This takes almost no time to whip up but the killer part is waiting for it to set up and freeze again. But the wait it worth it.

Frozen Samoa Cookie Pie-2

DIG IN!!!

Frozen Samoa Cookie Pie-3

Frozen Samoa Cookie Pie

Makes 9″ pie

Ingredients

  • 1 Nilla Wafer Pre-made Pie Crust
  • 8 oz of cream cheese, at room temperature
  • 1/3 Cup sugar
  • 2 Tablespoons low-fat milk
  • 1 container (8oz) Cool Whip, at room temperature
  • 12 Samoa Cookies, cut into dime sized pieces, divided
  • 1 cup shredded coconut, divided
  • chocolate syrup (about 1/2 cup)
  • caramel sundae syrup (about 1/2 cup)

Process

  1. Whip the cream cheese in a mixing bowl for a few minutes until light and fluffy. Add the sugar and milk and mix until fully incorporated it into cream cheese.
  2. Gently fold in the Cool Whip until it’s well blended together
  3. Put half of the filling mixture into the pie crust. Then put half of the coconut on the filling. Drizzle a lot of the caramel and chocolate sauces on the filling. Lastly, add in half of the cookie pieces.
  4. Pour the rest of the filling mixture on top of the fillings later. Spread evenly with a spatula.
  5. Sprinkle the remaining coconut and cookies on the top of the pie. Gently press into the top of the pie. Then generously drizzle with the caramel and chocolate sauces.
  6. Put the pie into the freezer to set up. I suggest at least 4 hours, but overnight is preferred.
  7. When ready to serve, remove from freezer and cut into all the pieces (8-12). (Cutting the pieces at once when frozen makes it easier to do.) Remove slices from pie plate and let thaw slightly on serving plate.
  8. Serve slices with more caramel and chocolate sauce. And a bit of whipped cream doesn’t hurt.

Inspired by Beyond Frosting

Filed Under: Pies and Tarts, Recipes, Uncategorized Tagged With: a year of pie, caramel, caramel syrup, coconut, frozen pie, Frozen Samoa Cookie Pie, Girl Scout cookies, pie, pies, Samoa Pie

Thin Mint Cookie Pie

February 28, 2014

Thin Mint Cookie Pie

Yay!!! It’s Girl Scout cookie season!

I get Girl Scout cookies every year. Typically I order them from one of my coworker’s daughter but being out on maternity leave I missed my chance to order from her. I was a little afraid that I would totally miss out on the opportunity to get those addictive Girl Scout cookies. But then I saw that a local troop would be setting up a table in my office building. Perfect! So I ran down one day and loaded up on this annual treat.

Thin Mint Cookie Pie-1

Now Girl Scout cookies are great on their own but I’ve learned that you can enjoy them in a variety of ways, including in baked goods, like the Thin Mint Gooey Cake Bars I made last year. How can you go wrong with adding cookies to a dessert? You can’t! It just makes it better.

Thin Mint Cookie Pie-4 Thin Mint Cookie Pie-3

Well, I had a box of Thin Mint cookies staring me down daring me to get to work. I had plenty of things in mind like cookies inside of cookies, cupcakes, and ice cream but ultimately decided to use the Thin Mints in a pie recipe. A minty, chocolaty pie… yes!!

Thin Mint Cookie Pie-5 Thin Mint Cookie Pie-6

This pie uses the Thin Mints in the no bake crust and then the minty chocolate pudding filling is garnished with whole Thin Mints. A whole cookie with each slice!!

This is such a simple pie to whip up. It takes about 20 minutes of active cook time and, thankfully, you don’t dirty many dishes either.

Thin Mint Cookie Pie-7 Thin Mint Cookie Pie-8

Making the pudding filling is very easy but you can’t rush it or neglect it either. If you cook it on too high of a temperature or don’t mix it enough you run the risk of burning the mixture. If you burn it you have to start over again and use some serious elbow grease to scrub your pot. And you don’t want to go that. You want to eat pie.

Thin Mint Cookie Pie-2

Thin Mint Cookie Pie

Makes a 9″ pie, 12 slices

Ingredients

Pie Crust

  • 24 Thin Mint cookies
  • 4 tablespoons butter, melted

Pie Filling

  • 2/3 cup granulated sugar
  • 1/3 cup cornstarch
  • 1/2 teaspoon Kosher salt
  • 4 egg yolks
  • 3 cup milk, any fat content (I used non-fat milk)
  • 2 Tablespoons butter
  • 1 teaspoon peppermint extract
  • 1 3/4 cups dark chocolate chips

To create the pie crust:

  1. Add the Thin Mint cookies to the bowl of a food processor and process until crumbs form.
  2. Add the melted butter, mix well.
  3. Firmly press the cookie crumb mixture into a 9″ pie plate.

To make the pie:

  1. Sift together the sugar, cornstarch, and salt into a 2 quart saucepan.
  2. In a medium sized bowl, combine the egg yolks and milk.  Slowly pour milk mixture into sugar mixture and stir to mix.
  3. Cook the mixture over medium-low heat, stirring constantly, until mixture comes to a low boil.  Continue to stir continually while it cooks for 1 more minute.  Remove from heat and stir in the butter and peppermint extract.  Add the chocolate chips and stir until chips are melted and the mixture is well blended. Let cool for 15-20 minutes, stirring it every 5 minutes.
  4. Pour into the Thin Mint cookie pie shell.  Lightly lay a piece of plastic wrap on top of pie filling before refrigerating for several hours until chilled.
  5. Garnish with 8 Thin Mint cookies around the edge of the pie plate so that each slice would have a cookie.

____________________

Looking for more Girl Scout Cookie Recipes?

Thin Mint Gooey Cake Bars

Samoa Cookie Cocktail

Filed Under: Pies and Tarts, Recipes Tagged With: a year of pie, chocolate, chocolate pie, cookies, Girl Scout cookie, Girl Scout cookies, mint, pie, Thin Mint, Thin Mint cookies, Thin Mint Pir, Thin Mints

Chocolate Football Hand Pies

January 31, 2014

Chocolate Football Hand Pies

It’s Friday! It’s Pie Day!

I’m excited for the Superbowl this weekend! Well, I am excited for the food. I’m excited to watch the game but I can’t realistically say I’ll watch the whole thing. Once Autumn falls asleep I’m quick to follow. Gotta maximize on my zzz’s! And there is DVR so we could always finish the game watching at 2am when we typically gets up for another bottle. Oh how things have quickly changed…

Chocolate Football Hand Pies-2 Chocolate Football Hand Pies-3

Chocolate Football Hand Pies-4 Chocolate Football Hand Pies-5

Anyway, I am looking forward to making a batch of Ham and Cheese Sliders to snack on during the all-day coverage. As well, I’m definitely making another (mini) batch of these Chocolate Football Hand Pies.

These are perfect to enjoy during The Big Game! They are hand held, quick to prepare, and a great sweet treat to finish off a day of salt, savory snacks.

Chocolate Football Hand Pies-1

I suggest that you prepare these in the afternoon so that you can just pop them in the oven at half time to enjoy them warm during the second half!

PS- I think these 2 are ready for The Big Game on Sunday! Okay, I just wanted to share some pics! ha!

Autumn 140131

Kemper 140131

Chocolate Football Hand Pies

Makes 12+ servings

Ingredients

  • 2 refrigerated 9″ pie dough sheets
  • 1/4 cup of flour
  • approximately 1 cup of Nutella
  • 1 egg
  • water

Process

  1. Preheat your oven to 350 degrees.
  2. Prepare your egg wash by beating 1 egg with 2 tablespoons of water.
  3. On a floured surface, smooth out the sheets of pie dough. Using a cookie cutter or stencil, cut out the footballs, at least 24.
  4. Lay out half of the footballs on your non stick cookie sheets. Put a generous tablespoon of Nutella in the center of the football. Then put a bit of egg wash along the edges.
  5. Place the top football on the bottom and seal the edges with a fork. Then lightly brush the top with the egg wash and using a knife, gently slice some football laces into the center of the top.
  6. Bake for 12-14 minutes. Remove from baking sheet quickly and enjoy warm!

Filed Under: Pies and Tarts, Recipes Tagged With: a year of pie, hand pie, handpie, handpies, nutella, pie, superbowl

No Bake Peanut Butter Pie

January 24, 2014

This No Bake Peanut Butter Pie has a chocolate cookie crust with a lusciously creamy peanut butter filling on a chocolate crust. It’s irresistible.

It is just too cold lately. I’m calling it quits and I am just going to stay in my PJ’s eating this awesome No Bake Peanut Butter Pie. Pass me a spoon. And an extra pair of cozy socks. 

…

Read More

Filed Under: Pies and Tarts, Recipes Tagged With: chocolate, cream cheese, creamy peanut butter, national peanut butter day, no bake, no bake pie, peanut butter, peanut butter pie, pie, whipped cream

My Chippy Cakey Birthday Pie

January 17, 2014

Chippy Cakey Pie

I am soo sooo sooooo glad it’s Friday. This has been a really long week for me.

On Monday I had a dentist appointment. Not bad but my teeth always hurt for a few days afterwards.

I’ve been sick all week with a cold. Being sick stinks no matter what but with a baby it’s so much worse. I feel extra drained on top of being sick.

Chippy Cakey Pie-01

My mom’s group that I look forward to every Friday afternoon has been canceled with the sudden announcement of the company closing. I’m glad that our group was at least established since we can at least continue to meet on our own but it was nice to have the space and the leadership from the organization.

And then yesterday Autumn was fitted with a hip brace. She was Frank Breech for most of the pregnancy so this effected the positioning of her hips. Autumn had an ultrasound on her hips a few weeks back and it showed the issue but they wanted to see if time would help fix things, unfortunately it didn’t so she got fitted with a brace. She took it like a champ. I, on the other hand, definitely did not. I totally did more crying about it than her.

Chippy Cakey Pie-02

It’s not been a fantastic week for me. Nothing earth shattering but just things that added up to a week that has drained me. So pity party of one.

But it’s Friday so it means one day to the weekend. One more day ’till my birthday!

Okay, I don’t love my birthday but I am looking forward to having Price around for it and for the pizza we make to celebrate it. Here’s to a relaxing snowy pizza filled day.

So, for this week’s pie I decided to make something that would be perfect to serve on a birthday. It would need to have cake it in. And yet also be a pie. Well, after searching Pinterest I found this pie that had cookie dough AND cake in it. And of course was topped with frosting. And sprinkles. WIN!!! 

This recipe uses all store brought ingredients, but you can easily use everything made from scratch. Just do what works for you. No matter what this will be a fun, yummy, unique pie to serve up.

Such a good combination of sweet indulgent things. Totally acceptable for a birthday!!

Chippy Cakey Pie-03

Chippy Cakey Birthday Pie

Makes a 9″ pie and approximately 8 cupcake sized mini pies

Ingredients

  • 1 16.5 oz roll of refrigerated chocolate chip cookie dough, room temperature
  • 1 16.5 oz box of Devil’s Food cake mix with ingredients to prepare it according to package directions
  • 2 refrigerated pie crusts, brought to room temperature
  • 1 can frosting
  • Sprinkles

Process

To make the 9″ pie

  1. Preheat the oven to 350 degrees. Spray a 9″ pie plate and set upon a rimmed baking sheet.
  2. Roll out 1 sheet of pie dough and line the greased pie plate with it.
  3. Flatten the cookie dough into 1/2″ thick layer to fit the bottom of the pie crust. Set aside the extra dough for the mini pies.
  4. Pour the prepared cake batter on top of the cookie dough layer filling the pie crust about 2/3 full to allow for room for the cake to rise. Set aside the remaining batter for the mini pies.
  5. Using a pie shield or foil, gently cover the edges of the pie to prevent them from browning too quickly.
  6. Bake the pie for 30 minutes then remove from the oven, discard the pie shield/foil, and return to the oven for another 15-25 minutes or until the top is set and a toothpick inserted near the center comes out mostly clean. Begin checking the done-ness of your pie at the 30-minute mark, as different types of cake mix may alter the baking time.
  7. Allow the pie to cool completely before frosting and decorating with sprinkles. Cut into wedges to serve and store leftovers airtight at room temperature, up to a day.

To make the mini pies

  1. Spray 8 cavities of a muffin tin.
  2. Roll out 1 sheet of pie dough. Using the rim of a glass or a cookie cutter, cut out 8 circles. Line the greased cavities with the circles.
  3. Flatten the remaining cookie dough into 1/2″ thick layers to fit the bottom of the pie crust.
  4. Pour the remaining prepared cake batter on top of the cookie dough layer filling the pie crusts about 2/3 full to allow for room for the cake to rise.
  5. Bake for 15 minutes or until the top is set and a toothpick inserted near the center comes out mostly clean. Begin checking the done-ness of your pie at the 11 minute mark, as different types of cake mix may alter the baking time.
  6. Allow the mini pies to cool completely before frosting and decorating with sprinkles.

Sourced from The Domestic Rebel

Filed Under: Pies and Tarts, Recipes Tagged With: a year of pie, birthday pie, cake, cake pie, cookie cake pie, cookie dough, frosting, pie, sprinkles

Chocolate Icebox Pie

January 10, 2014

Chocolate Icebox Pie

When I was trying to think of the pie to make for this week I remembered how my best friend made this Chocolate Icebox Pie for their first Thanksgiving in Seattle this year. They enjoyed it so I wanted to give it a try myself.

I’m so glad I did since it was so good!!

I love pies with graham cracker crusts. And obviously a filling made of rich chocolate is gonna find a place into my heart. And stomach.

Chocolate Icebox Pie-03 Chocolate Icebox Pie-02 Chocolate Icebox Pie-04 Chocolate Icebox Pie-05

The pie doesn’t take much time or effort to make so it’s something that you can whip up quickly when you are craving some chocolate. The homemade graham cracker crust is so good but if you’re in a real rush then I’m sure that store-bought one would work as well.

There are not that many ingredients so be sure to use good quality ones, especially the chocolate. As well, if you are melting the chocolate in the microwave, be sure to do it slowly so that you don’t burn it. Burned chocolate makes me sad.

As well, for the crust I strongly suggest putting the cinnamon in as it add a really nice flavor that kicks up the chocolate. And to have a cleanly cut pie, I suggest you cut the pie when it is really cold. This helps get a nice smooth slice and helps the crust stay intact.

Chocolate Icebox Pie-06 Chocolate Icebox Pie-07 Chocolate Icebox Pie-08 Chocolate Icebox Pie-09 Chocolate Icebox Pie-10 Chocolate Icebox Pie-11

This is the kind of pie that is perfect to enjoy after dinner (or maybe before!) or to take to a dinner party. It is simple to make and would be a crowd-pleaser. It makes 8 generous slices but it is so so rich that I could easily see it being cut into 16 thin slices.

This was the first time I made an icebox pie and it won’t be my last. There are so many different varieties that I have plenty to pick from as well. 🙂

Chocolate Icebox Pie-01

Chocolate Icebox Pie

Makes a 9″ pie

Ingredients

Crust

  • 1 1/4 cups finely crushed graham cracker crumbs
  • 1/4 cup sugar
  • 1/2 teaspoon cinnamon, optional
  • 5 tablespoons unsalted butter, melted

Filling

  • 1/3 cup hot water
  • 2 tablespoons Double-Dutch Dark Cocoa
  • 1 tablespoon vanilla extract
  • 1 1/3 cups bittersweet chocolate chips, chunks, or disks
  • 1 1/2 cups heavy cream
  • 1 tablespoon granulated sugar
  • 1/8 teaspoon salt

Garnish, optional

  • Whipped cream
  • Chocolate shavings

Process

To make the crust:

  1. Preheat your oven to 375 degrees.
  2. Combine the ingredients, and press the mixture into the bottom and up the sides a lightly greased 9″ pie pan.
  3. Freeze the crust for 15 minutes (which will prevent over-browning).
  4. Bake for 8-10 minutes, until it’s lightly browned around the edges. Remove from the oven and cool completely.

To make the filling:

  1. In a small bowl, combine the hot water, cocoa, and vanilla extract and set aside. 
  2. Melt the bittersweet chocolate in a microwave or in a double-boiler. Stir the cocoa mixture into the melted chocolate, it will resemble a pudding when completely incorporated.
  3. Whip the cream, sugar, and salt with a hand or stand mixer until soft peaks form.
  4. Gently fold the chocolate mixture into the whipped cream with a whisk or rubber spatula until no white streaks remain. 
  5. Spread the pie filling evenly into the cooled graham cracker crust.
  6. Refrigerate the pie for at least 1 hour before serving, or until the filling is set and firm.
  7. Garnish with whipped cream and chocolate shavings prior to serving.

Sourced from King Arthur Flour

Filed Under: Pies and Tarts, Recipes Tagged With: a year of pie, chocolate, chocolate icebox pie, chocolate pie, icebox pie, King Arthur Flour, King Arthur Flour Recipe, pie

Key Lime Pie

July 6, 2013

Key Lime Pie

So I have been trying to ‘spice up’ the massive amounts of water I drink on a daily basis with slices of limes. But really it just makes me want mojitos and margaritas. Dang it!

…

Read More

Filed Under: Pies and Tarts, Recipes Tagged With: custard pie, dessert, grah, graham cracker crust, key lime pie, limes, NASCAR, pie, sprint cup snacks, whipped cream

Super Simple Mini Cherry Pies

June 14, 2013

Super Simple Mini Cherry Pies

Okay, okay! So this recipe isn’t really a recipe. But hear me out…

They are just so cute not to share! Plus, I just love simple things that you can throw together from start to finish in like 25-30 minutes.

I picked this summery recipe for this week’s edition of Sprint Cup Snacks because I wanted to take a picture and use these new napkins in it. NO!!! It’s because this weekend’s race is at Michigan International Speedway, and Michigan is known for their cherries. I mean, come on, the National Cherry Festival is held Michigan. Perfect!

Super Simple Mini Cherry Pies_02 Super Simple Mini Cherry Pies_03

Some helpful tips along the way. Basically don’t do what I did the first time I made these…

  • Do not over fill. They can easily bubble out all over the muffin tin.
  • Do not over bake. They are tiny so they are quick baking therefore don’t go up stairs to do laundry (out of range to hear the buzzer) and then run downstairs frantically when you remember you have something in the oven.
  • Let them cool a lot before you try to take them out of the well greased muffin tin.

Super Simple Mini Cherry Pies_01

Since this is a basic recipe feel free to change up the fruit or even the design on top. Just remember they are so super cute no matter what since they are teeny tiny 🙂

Super Simple Mini Cherry Pies

Makes 18 mini pies

Ingredients

  • 2-9″ pie crusts
  • 1- 14 ounce can of cherry pie filling
  • 1 egg, plus 2 tablepsoons water
  • sugar
  • Need a 2″ circle cookie cutter and a very small star cookie cutter

Process

  • Preheat your oven to 425. Grease a mini muffin tin.
  • Use a 2″ circle cutter to cut circles out of the pie dough. Place one circle in each opening.
  • Place 2 tablespoons of the filling in each tart shell. (I placed 3 cherries per pie)
  • Cut the stars tops out of the remaining pie dough and top each tart with a star.
  • Make an egg wash by beating one egg with the water. Brush the top of each tart and then sprinkle with a bit of sugar.
  • Bake for 12-15 minutes on the upper rack.

Slightly adapted from Frankly Entertaining

Filed Under: Cherry, Pies and Tarts, Recipes Tagged With: cherry, cherry pie, Fourth of July dessert, mini cherry pie, mini pies, NASCAR, quick dessert, simple dessert, sprint cup snacks

Tar Heel Pie

May 17, 2013

Tar Heel Pie

A few years back Price and I visited Charlotte, NC for a little vacation. We were, and I guess still are, entertaining the idea of moving down there. Far far away from now, like when I just can’t take 1 more snowy winter. We’ll see where things go but I liked the area. Although housing developments and complexes that are outside the city are so foreign to me. Just don’t see much of that up here in New England. Plus everyone drove so slow. Us Massholes are used to going 75+ in a 65 mph zone, but down there with the same speed limit people were going 63. Strange.

Tar Heel Pie_02 Tar Heel Pie_03

Anyway, we enjoyed our trip down there getting to try all the great food, wander around, visit the NASCAR Hall of Fame, and get a tour of Charlotte Motor Speedway. I loved being in the heart of NASCAR. So that is why I’m so excited for this weekend’s NASCAR Sprint All Star Race, that is held in Charlotte.

Tar Heel Pie_04 Tar Heel Pie_05

For this week’s edition of Sprint Cup Snacks I picked this pie because it has the same name as the nickname for North Carolina. The Tar Heel State needs a Tar Heel Pie! The state has has that nickname from their vast pine forests that make tar, pitch, and turpentine.

Tar Heel Pie_06 Tar Heel Pie_07

I shared some pie with a coworker and he asked me about it since he’d never heard of Tar Heel Pie before. I simply told him “Chocolate, sugar, pecans!” That’s basically it but it’s so much more as well. So good.

Tar Heel Pie_01

This pie will have you begging for mercy! So dang good!

Tar Heel Pie

Makes 8-12 slices, all depends on how hungry you are!

Ingredients

  • 1 handmade or store-bought 9″ pie crust
  • 1/2 cup butter, melted
  • 1 cup semisweet chocolate chip
  • 1/2 cup sugar
  • 1/2 cup packed brown sugar
  • 1/3 cup flour
  • 2 eggs
  • 1 teaspoon vanilla extract
  • 1 teaspoon instant coffee granules
  • 1/4 teaspoon Kosher salt
  • 1 cup toasted chopped pecans
  • Whipped cream for serving

Process

  1. Preheat oven to 350 degrees. Place the prepared pie crust and 9″ pie plate onto a rimmed baking sheet.
  2. Place the chocolate chips in a large bowl and pour the warm melted butter on top, stir until completely melted and smooth.
  3. Add the sugars, flour, eggs, vanilla, coffee, and salt, mix to combine. Stir in the nuts.
  4. Pour the filling into the prepared pie shell. Bake until set and the crust is golden brown, 30-35 minutes.
  5. Let stand for at least 1 hour before serving. Garnish with whipped cream.

Source: Happier Than a Pig in Mud

Filed Under: Pies and Tarts, Recipes Tagged With: Tar Heel Pie, Tar Heel State

Coconut Cream Pie- SRC

March 25, 2013

Coconut Cream Pie_SRC

It’s Secret Recipe Club time again!!

As usual I told Price to check out the blog and to pick out the recipe that I should make for this month. I only specified that I didn’t want to make a cake or cookies. So Price headed over to My Beautiful Disasters and checked out the recipes that Casey has made. He picked out the Coconut Cream Pie as I’ve been saying that I want to try to make more pies.

Coconut Cream Pie_01 Coconut Cream Pie_02

Coconut Cream Pie_03 Coconut Cream Pie_04

We loved this pie. It was so easy to make and tasted so good. Casey remarked that when she made it that it didn’t set up well. I didn’t have trouble setting it up but I did recently cook a chocolate pudding pie so I figured I would make sure I get it thick enough while cooking it instead of having it set up while chilling, just like when I that one. It just took some time and patience to stand there and stir constantly but it totally was worth it.

Coconut Cream Pie_05 Coconut Cream Pie_06

Coconut Cream Pie_07 Coconut Cream Pie_08

I’m so glad that Price picked this recipe from Casey’s blog. It was a fantastic recipe to make for SRC. I only wish I had planned enough in advance (when will I learn?!?!) to make her homemade pie crusts. I just grabbed a 9″ pie crust from the grocery store and baked it according to its instructions and let it cool completely. Simple. The only thing I did different was that I used the coconut extract instead of the vanilla extract in the whipped cream. I just wanted it to scream coconut!

If you love coconut then you’ll love this coconut cream pie!

Coconut Cream Pie

Makes 12 slices

Ingredients

1 pre-baked 9-inch pie shell

Coconut Cream Pie Filling

  • 4 egg yolks
  • 2 cups milk
  • 1 cup sugar
  • 1/4 cup cornstarch
  • 1/2 teaspoon salt
  • 3/4 cup shredded sweetened coconut
  • 2 tablespoon butter
  • 1 teaspoon coconut extract

Whipped Cream

  • 1 cup whipping cream, whipped
  • 1 tablespoon powdered sugar
  • 1/2 teaspoon coconut extract
  • 1/2 teaspoon vanilla extract

Coconut Topping

  • 1/2 cup of shredded sweetened coconut

Process

  1. Use either a purchased pie crust or a homemade one. Pre-bake according to instructions/recipe, allow to cool completely.
  2. Preheat the oven to 350. On a rimmed baking sheet, spread out the 1/2 cup of the shredded coconut. Toast for 5 minutes, or until golden brown. Let cool.
  3. To make the filling, combine the yolks, milk, sugar, cornstarch, and salt in a heavy bottomed saucepan; mix well. While continuelly stiring, cook slowly over medium low heat until the mixture bubbles and begins to thicken. Reduce to low and stir in the coconut and butter. Continue to cook and stir until very thick, approximately another 5 minutes. Remove from the heat and stir in the coconut extract.
  4. Cool the filling approximately 10-15 minutes prior to pouring into the pie shell.
  5. Whip the whipping cream over medium speed. Once it begins to thicken, add in the powdered sugar and extracts.
  6. Evenly spread the whipped cream over the cooled pie. Sprinkle the toasted coconut over the whipped cream. Serve chilled.

_____________________

Secret Recipe Club

Check out the rest of the reveal day posts!


 Check out my previous Secret Recipe Club Posts

____________________

Thanks for visiting. Please leave me a comment to provide some feedback. I appreciate all the comments I receive.

Filed Under: Pies and Tarts, Recipes Tagged With: coconut, coconut cream pie, coconut extract, My Beautiful Disasters Blog, pie, pie crust, pudding pie, Secret Recipe Club, shredded coconut, SRC

Gone to Heaven Dark Chocolate Pie

February 13, 2013

Gone to Heaven Dark Chocolate Pie

Some something magical happened at Christmas…

Gone to Heaven Dark Chocolate Pie_01 Gone to Heaven Dark Chocolate Pie_02

My mom got me a 12-cup food processor. Oh, the joy! I have wanted a food processor for so long. I’ve managed to make pestos and sauces in our blender but it is just the same. So I knew having a food processor would making pesto, sauces, mayo, grated cheese, and ground meat so super easy. But best of all I was looking forward to making pie dough in it.

Gone to Heaven Dark Chocolate Pie_03 Gone to Heaven Dark Chocolate Pie_04

I’ve been pinning different pies like crazy on Pinterst. My “Sweets-Pie” board is filing up. I have some plans to start to tackle the pins this spring. So, well, you’ve been warned. The first thing that jumped out to me was a Dark Chocolate Pie from One Ordinary Day and I knew I had to make it asap. But guess what… no need to use the food processor as it has a graham cracker crust. Well, go figure! ha!

Gone to Heaven Dark Chocolate Pie_05 Gone to Heaven Dark Chocolate Pie_06

Making a graham cracker crust is so easy so I felt I should make my own instead of buying one. Plus this was when we were snowed in last week so going out for a pie crust was not an option. Just 3 ingredients and a bit of mixing and you’re already half way done to a homemade graham cracker pie crust. The one disadvantage of making the crust is that is thicker than a store-bought crust, which meant I could not get all of the pie filling in the pie. Oh the horror! A bowl of just chocolately pie goodness. noms!

Gone to Heaven Dark Chocolate Pie_07 Gone to Heaven Dark Chocolate Pie_08

The pie is basically a cooked pudding so it is quick and easy to make. You really need to keep stirring the mixture while it is heating up since you don’t want clumps or for it to burn  to the pan. My mixture didn’t come to a boil as I have the tendency to burn milk to pans (and then subsequently swear at them or throw them out) so I cooked the filling on a medium-low heat. This meant the overall process took 25 minutes. The most important thing is for it to cook and thicken so I don’t really think boiling is key.

Gone to Heaven Dark Chocolate Pie_09 Gone to Heaven Dark Chocolate Pie_10

Try this pie. You can whip it up easily. Perfect for Valentine’s day to show the person you love that they deserve something sweet (besides you). Or make these at any time to show yourself that you deserve the best chocolate pie.

Gone to Heaven Dark Chocolate Pie

Servings 12 slices

Ingredients

Graham Cracker Pie Crust

  • 2 cups graham cracker crumbs
  • 1/2 cup melted butter
  • 1/3 cup sugar

Chocolate Pie

  • 2/3 cup granulated sugar
  • 1/3 cup cornstarch
  • 1/2 teaspoon Kosher salt
  • 4 egg yolks
  • 3 cup milk, any fat content (I used 2% milk)
  • 2 tablespoons butter
  • 1 tablespoon pure vanilla extract
  • 1 3/4 cups dark chocolate chips
  • whipped cream nad chocolate shavings, optional for garnish

Process

To create the pie crust:

  1. Preheat oven to 400 degrees. Spray a 9-inch pie plate non-stick cooking spray.
  2. Combine all of the ingredients.
  3. Evenly press the crust into the bottom and up sides of the pie plate.
  4. Bake for 10 minutes, until golden brown. Let cool completely.

To make the pie:

  1. Combine the sugar, cornstarch, and salt in a 2 quart saucepan.
  2. In a medium sized bowl, cmbine egg yolks and milk.  Slowly pour milk mixture into sugar mixture and stir to mix.
  3. Cook the mixture over medium heat, stirring constantly, until mixture comes to a boil.  Boil while continually stirring for 1 minute.  Remove from heat and stir in the butter and vanilla extract.  Add the chocolate chips and stir until chips are melted and the mixture is well blended.
  4. Pour into the graham cracker pie shell.  Lightly lay a piece of plastic wrap on top of pie filling before refrigerating for several hours until chilled.
  5. Garnish with whipped cream and shaved chocolate before serving.

Filed Under: Pies and Tarts, Recipes Tagged With: chocolate, dark chocolate, Gone to Heaven Dark Chocolate Pie, graham cracker crumbs, graham cracker crust, no bake pie, pie

Brownie Pie

November 12, 2012

I love to get mail. I used to have pen pals when I was younger. One was from Finland and she used to write the date D-M-Y. I loved it for some random reason. Well now without pen pals I just get bills, magazines, and some packages. I love the arrival of my monthly Studio Calico kit. I just get so giddy with anticipation and once it gets here I love that the package holds so many creative possibilities  Well, I was just as giddy for the arrival of Tate’s Bake Shop: Baking For Friends. As soon as I finished interviewing Kathleen King I bought her new book. I could not wait for it to come that I upgraded my prime and got it the next day. I just could not resist waiting to get my hands on that book.


Once I was able to browse the book I got myself into some trouble picking out what to make first. I was drawn to so many different recipes because of their ease. I love baking but I love to find simple recipes because I am so busy I just can’t spend so much time of something that I don’t eat. I’m glad Kathleen focuses on keeping her recipes simple but delicious. The book has over 120 recipes of muffins, scones, quick breads, pies, cupcakes, and cookies. Out of all of that I was really struggling to decide on Rocky Road Muffins (pg 31), Apple- Italian Plum Deep Dish Pie (pg 69), Brownie Pie (pg 71), and Pecan Squares (pg 138). I finally decided on the brownie pie and I think I made a great choice.


The Brownie Pie is a really simple, really rich dessert. Just a few ingredients and a few minutes of manning the mixer and you’re on our way to a chocolaty delight. This really works for any number of people as it’s great for sweets addicts to chocoholics and people who keep to a gluten free diet. It covers all bases and does so perfectly.  The recipe calls for even more chocolate stating that a slice is to be served with a smear of nutella and whipped cream. I served this with some whipped cream and fresh raspberries and blackberries since I just wanted it to be a tad bit lighter when serving it as the pie is so rich. Grab yourself a glass of milk and a slice and enjoy!

Brownie Pie

serves 8 to 10

Ingredients

  • 12 ounces of semi sweet chocolate chips
  • 1 stick of salted butter, at room temperature
  • 1 teaspoon vanilla extract
  • 5 eggs plus 4 egg yolks, at room temperature
  • 1/3 cup packed dark brown sugar

Process

  1. Preheat the oven to 325 degrees. Prepare a 9-inch glass pie plate by lightly buttering it.
  2. In a microwave safe bowl combine the chocolate chips and pieces of the butter. Microwave on 50% power for 2 minutes, stir the chocolate every 30 seconds.
  3. In a large bowl or stand mixer, beat the eggs on high until thickened and light in color, about 3 minutes. Add the brown sugar the mixture is light and fluffy. Incorporate the melted chocolate. Pour into the prepared pie plate.
  4. Bake for 45 minutes, or until a toothpick inserted in the center is clean upon its removal. Let cool on a wire rack.
  5. Serve with whipped cream, berries, caramel sauce, or nutella.

Filed Under: Pies and Tarts, Recipes Tagged With: brownie, brownie pie, chocolae chips, chocolate, chocolate pie, dessert, gluten free, Kathleen King, nutella, pie, recipe, Tate's bakeshop, whipped cream

  • « Go to Previous Page
  • Go to page 1
  • Go to page 2
  • Go to page 3
  • Go to page 4
  • Go to page 5
  • Go to Next Page »

Primary Sidebar

EMAIL NEWSLETTER!

Sign up HERE for meal planning suggestions & tips to take a great trip!

Top Posts & Pages

  • New Haven Style White Clam Pizza
    New Haven Style White Clam Pizza
  • Chocolate Chip Pudding Cookies
    Chocolate Chip Pudding Cookies
  • Room Review: Cars Family Suite in Disney World's Art of Animation Resort
    Room Review: Cars Family Suite in Disney World's Art of Animation Resort
  • Easy Pepperoni Pizza Roll Ups
    Easy Pepperoni Pizza Roll Ups
  • Quick and Easy Cabbage Slaw
    Quick and Easy Cabbage Slaw
  • Southwest Orzo Salad with a Cilantro Lime Vinaigrette
    Southwest Orzo Salad with a Cilantro Lime Vinaigrette
  • Strawberry Dessert Cookie Pizza
    Strawberry Dessert Cookie Pizza
  • Meghan Markle's Zucchini Pasta Sauce
    Meghan Markle's Zucchini Pasta Sauce
  • Baked Rice Pudding Using Leftover Rice
    Baked Rice Pudding Using Leftover Rice
  • Girl Scout's Thin Mint Gooey Cake Bars
    Girl Scout's Thin Mint Gooey Cake Bars
collage of recipes of common ingredients
collage of soup stew and chilis bowls

Follow Us

Copyright© 2026 · Brunch Pro Theme by Feast Design Co.

Loading Comments...

You must be logged in to post a comment.