• Skip to main content
  • Skip to primary sidebar

I am a Honey Bee

All about my adventures with cooking, crafts, and travel

  • Home
  • About
    • About Me!
    • Press
    • Privacy Policy & Disclosures
    • Contact
  • Recipe Index
  • Exploring
    • Exploring- Florida
    • Exploring- Boston
    • Exploring- Cruises
    • Exploring- New England
    • Exploring- New York City
  • Resources
  • Disney Fun!

a year of pie

Chocolate Ganache Topped Crunchifed Peanut Butter Pretzel Pie

May 16, 2014

Ganache Topped Peanut Butter Pretzel Pie

Oh, what a week it has been!

Our poor pup starting throwing up on Monday night and has been sick since. We had hoped his stomach issues would clear up on their own but no luck. As Price was hand feeding him rice on Wednesday night we decided he would go to the vet as soon as the opened on Thursday morning. So Kemper spent the day at the vet getting tests run to figure out what was wrong with him. Thankfully, he tested negative for giardia but he definitely has a stomach bug.

Ganache Topped Peanut Butter Pretzel Pie-1

I’m hoping that his pill, powder for his food, and his prescription food help him feel better quickly. Especially since I stepped in some poo this morning before I put the lights on. It’s not like him to have accidents so I know he is sick so I can’t get mad but man, what a way to start a Friday morning.

But it’s Friday, so that means it’s time for pie!!!

Ganache Topped Peanut Butter Pretzel Pie-4 Ganache Topped Peanut Butter Pretzel Pie-5

Ganache Topped Peanut Butter Pretzel Pie-7 Ganache Topped Peanut Butter Pretzel Pie-6

I had been thinking of making a pie with a pretzel crust for a bit now. I’ve done the graham cracker crust. And the chocolate cookie crust. So I wanted to try something different and I just love the sweet and salty combo of things.

This Chocolate Ganache Topped Crunchifed Peanut Butter Pretzel Pie will leave you weak in the knees. It’s really rich. It’s the perfect triple threat of pretzels, peanut butter, and chocolate.

Ganache Topped Peanut Butter Pretzel Pie-8 Ganache Topped Peanut Butter Pretzel Pie-9

Ganache Topped Peanut Butter Pretzel Pie-10 Ganache Topped Peanut Butter Pretzel Pie-11

I highly recommend pulling out your food processor to make this crust. I’m sure that you can crunch up the pretzels in the ziplock bag using a rolling pin but I just don’t think you’ll get the pieces small enough for the crust to hold together well.

The peanut butter filling is really light and crunchy. Using crunchy peanut butter adds a little extra crunch to the pie. If you don’t have crunchy peanut butter on hand then just use creamy. Don’t hold off on making this pie just for that.

Ganache Topped Peanut Butter Pretzel Pie-12 Ganache Topped Peanut Butter Pretzel Pie-13

Ganache Topped Peanut Butter Pretzel Pie-14 Ganache Topped Peanut Butter Pretzel Pie-15

But the chocolate ganache that tops off the pie is the finishing touch! It’s silky, rich, and chocolately. And then jazzed up some more with the chopped up peanuts and pretzels that are sprinkled on top.

Plan ahead when making this pie. This is not a last minute project as it needs to chill for a few hours. I suggest making it the morning that you want to serve it. Or even the night before so it sets up really well.

Ganache Topped Peanut Butter Pretzel Pie-2

Thankfully, I am kicking it out of my house before I eat it all. Five slices will be on their merry way out the door today when our dog walker comes for Kemper today. She is the best but her flexibility this month has been incredible. There have been so many last minute changes from the typical M-Th schedule with extra vet appointments for Kemper to have a cracked molar extracted, to days I’ve worked from home because of appointments for Autumn, and now this latest adventure. I just hope they enjoy it for dessert tonight as much as we did! 🙂

Ganache Topped Peanut Butter Pretzel Pie-3

Chocolate Ganache Topped Crunchifed Peanut Butter Pretzel Pie

Makes a 9″ Pie

Ingredients

Crust

  • 7 ounces/200 grams of pretzels
  • 1/4 cup brown sugar
  • 10 tablespoons of unsalted butter, melted

Filling

  • 1 cup heavy cream
  • 8 ounces cream cheese
  • 1 1/2 cups crunchy peanut butter
  • 1 cup confectioner’s sugar
  • 1 teaspoon vanilla extract

Ganache Topping

  • 1 cup of heavy cream
  • 8 ounces of semi-sweet chocolate

Garnish

  • 1/4 cup salted peanuts, chopped
  • 1/4 cup pretzels, chopped up intosmall pieces

Process

  1. Preheat your oven to 350 degrees.
  2. Put the pretzels in a food processor and process until the pretzels are crushed enough to resemble crumbs.
  3. Combine the ingredients, and press the mixture into the bottom and up the sides a lightly greased 9″ pie pan.
  4. Freeze the crust for 15 minutes (which will prevent over-browning).
  5. Bake for 12-15 minutes, until it’s lightly browned around the edges. Remove from the oven and cool completely.
  6. To make the whipped cream for the filling, whip the heavy cream until there are stiff peaks. Set aside.
  7. To make the filling base, beat the cream cheese for 3 minutes, scrape the bowl every minute. Add the confectioner’s sugar and beat for another minute, scrape down the sides of the bowl. Add the peanut butter and vanilla extract, beat for another 2 minutes.
  8. Completely fold the whipped cream into the peanut butter mixture.
  9. Pour the filling into the cooled pie crust. Smooth out the top and then put the pie into the freezer.
  10. Prepare the ganache but setting a heat safe bowl over a  pot with some water in it. Do not allow the water to touch the bottom of the bowl.  Heat the water to a simmer and add the heavy cream. Heat the cream until it is warm and add the chocolate. Mix the chocolate until all of it is melted into the heavy cream. Remove the bowl from the top of the pot and let cool for about 10 minutes.
  11. Mix the ganache one more time and then pour it on top of the chilled filling. Tap the pan to even out the top and to remove any bubbles in the ganache.
  12. Sprinkle the top of the ganache with the chopped peanuts and pretzels.
  13. Return to the freezer for at least 4 hours. Remove from the freezer 15 minutes prior to serving. Slice and enjoy!

Inspired by Baking the Goods

Filed Under: Pies and Tarts, Recipes Tagged With: a year of pie, a year of pies, Baking, chocolate chips, ganache, ganache topping, peanut butter pie, Peanuts, pie, pretzel crust

Mother’s Day Pie

May 9, 2014

Mother's Day Pie

I’m so excited for the weekend!!

We have so much to do but it should be fun to enjoy the weekend and get a bunch of stuff done. Fingers cross on us actually tackling the to do list.

Plus, it’s going to be nice weather. Well, it might rain Saturday but it’s supposed to be warm so I can work with that. But Sunday is supposed to be even better. Also, it’s my first Mother’s Day, so that should be fun.

Mother's Day Pie-1

Price has agreed to help Autumn whip up breakfast for Mother’s Day while we lounge around in the morning. She was babbling to him that it might be hard to make waffles considering she can’t yet sit up, so he agreed to do the heavy lifting, but as long as she watched to learn how to make on of my favorite breakfast treats.

Man, I love waffles. I swear I could eat waffles every weekend. That and Eggs Benedict. Oh yeah, maybe I’m have some pie too. Okay, okay, I’m behave…

Every week I ask Price what pie I should make for my weekly pie post. Sometimes I offer him a few choices between things and other times he comes up with the idea completely. This week I threw some ideas at him, he veto’d them (for now), did some googling and found this pie. And this is how this pie came to be.

It reminds me of a mega coconut macaroon. It’s sweet, custardy, and very coconuty. I enjoyed it just like that but I think a chocolate drizzle would be amazing on it as well.

Mother’s Day Pie

Makes a 9″ pie

Ingredients

  • 1 cup sugar
  • 2 tablespoons all-purpose flour
  • 1/4 teaspoon salt
  • 6 tablespoons butter, melted
  • 1 teaspoon vanilla extract
  • 3 eggs
  • 1 (12-ounce) can evaporated milk
  • 1 cup shredded coconut

Process

  1. Preheat oven to 325 degrees. Generously grease and flour a 9 inch pie plate.
  2. In a medium bowl, mix together sugar, flour, and salt.
  3. Stir in melted butter and vanilla extract. Add the eggs one at a time, mixing well after each addition. Mix in evaporated milk followed by the shredded coconut.
  4. Pour mixture into the pie plate.
  5. Bake in preheated oven for 40-50 minutes. The center of the pie will still be slightly jiggly. Remove from oven to set up at room temperature. Chilling a bit before serving will help with cutting cleaner slices

Sourced from All Recipes

Filed Under: Pies and Tarts, Recipes Tagged With: a year of pie, coconut, egg custard pie, mother's day, mother's day brunch, Mother's Day Pie, no crust pie, pie

Chocolate Chip Cookie Ice Cream Pie

April 25, 2014

 Chocolate Chip Cookie Ice Cream Pie-1

I am so happy it’s Friday. Giddy, I tell you!

Why…

…

Read More

Filed Under: Pies and Tarts, Recipes Tagged With: a year of pie, Chocolate Chip Cookie Ice Cream Pie, chocolate chip cookies, cookies, ice cream, ice cream pie

Banana Cream Pie

April 11, 2014

Banana Cream Pie

I am just itching to go on vacation.

At the very least planning one would cool my wanderlust urges. I just love adventures and times to relax in a new setting. I love to discover new places and try new things.

Price and I are looking into cruises for next January as a way to celebrate my 30th. I think a week in the Caribbean is just the best idea to break up the cold winter up here. Plus I think turning 30 while sipping a daiquiri as I soak up the sun is they best way to spend a milestone birthday

As well, I’m waiting for Jet Blue to release more dates next year so that Emily and I can have a girl’s weekend. I can’t wait to check out Seattle and have her show me all around.  Everything she has been telling me about the PNW sounds awesome. I think it will be such a fantastic time. yay!

Anyway, let’s check out this awesome pie for Pieday Friday!

Banana Cream Pie-2

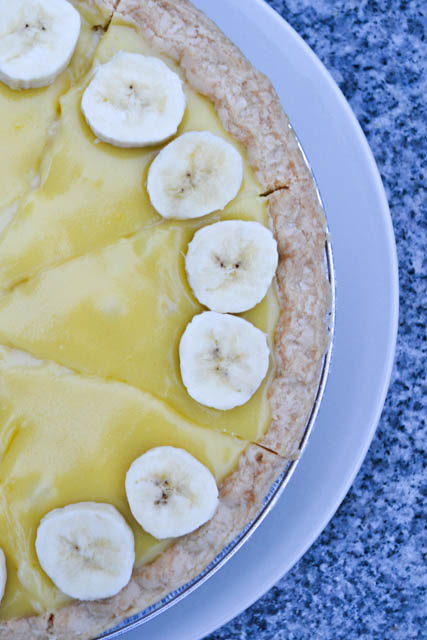
This banana cream pie should be illegal.

It’s that good. Really really good.

The flavor is so good. The silky smooth pudding filling is a great companion to the fresh bananas.

Price came back from work and I basically shoved a spoonful of the pudding into his mouth the moment he walked in. I don’t think he minded though. Well, maybe it was a tease because he had to wait for it to set up. ha!

I suggest that you make the pie well in advance of serving it. You can let it chill for an hour but I think that the longer the better. Then you garnish it right before serving so the bananas don’t brown. And I think that some whipped cream is great for a garnish as well. yum!!

Banana Cream Pie-1

What pies should I make next? I’m taking suggestions!!

Banana Cream Pie

Makes a 9″ Pie

Ingredients

  • 1 9″ deep-dish pie crust
  • 3/4 Cup sugar
  • 1/3 Cup flour
  • 1/4 teaspoon salt
  • 2 cup milk
  • 3 egg yolks, beaten
  • 2 Tablespoons
  • 1 1/2 teaspoon vanilla extract
  • 5 bananas

Process

  1. Bake the pie crust according to the packaged instructions/recipe. Let completely cool.
  2. Slice 4 of the bananas into 1/4″ thick rounds. Set aside.
  3. Preheat your oven to 350 degrees.
  4. In a medium-sized saucepan, combine the sugar, flour, and salt. Gradually pour the milk in while stirring gently. While continuously whisking, cook over medium heat until the mixture is bubbly. Keep stirring and cook for about 2 more minutes, and then remove from the burner.
  5. Mix a small quantity (about 1/3 cup) of the hot pudding mixture into the beaten egg yolks, and immediately add egg yolk mixture to the rest of the hot mixture. While continuously whisking, cook for 2 more minutes.
  6. Remove the mixture from the stove, and add butter and vanilla. Stir until the whole thing has a smooth consistency.
  7. Place the banana slices in the cooled baked pastry shell and then top with pudding mixture.
  8. Bake for 12 to 15 minutes. Chill for 1 hour before slicing. Garnish with the remaining banana prior to serving.

Sourced from All Recipes

Filed Under: Banana, Pies and Tarts, Recipes, Uncategorized Tagged With: a year of pie, banana, banana cream pie, banana pie, bananas, pudding

Incredibly Easy Chicken Pot Pie

March 21, 2014


Impossibly Easy Chicken Pot Pie

Finding quick, easy recipes is my jam right now.

I’ve been attacking Pinterest like crazy looking for quick/easy dinners like one pot dinners, slow cooker meals, quick pasta dishes, and salads. I’m so looking forward to all the salads we are going to be eating once the weather warms up. Yes, we eat plenty of salads in the winter but we just get all wild and crazy in the spring and summer. Ah, greens bliss. Plus they are super quick meals to toss together which is key right now.

…

Read More

Filed Under: Poultry, Recipes Tagged With: a year of pie, Better Crocker Bisquick, Bisquick, Bisquick mix, chicken, chicken pot pie, Simple Chicken Pot Pie

Frozen Samoa Cookie Pie

March 14, 2014

Frozen Samoa Cookie Pie

It is finally going to be nice out tomorrow so we are going to test drive some cars!

I feel like I’m betraying our other car. Ahh poor Frank the Tank.

Frozen Samoa Cookie Pie-1

But Frank is just too small now. Not in the ‘we have a new baby and have tons of stuff small’ but ‘we have a new baby and no one can sit in the passenger seat now because of the car seat’ small. Yep, that’s what happens when your Scion Xa is the size of a matchbox car. It means with the car seat in the back you can’t sit in front. Well, you can but then your knees are touching the dashboard and that’s not the safest thing.

Now we are getting a new car so that it doesn’t mean that one of us is playing chauffeur.

Thankfully, Frank has been paid off for years so he is sticking around and will be the car we use when we are just running errands. I can’t ditch Frank yet! He only has 115K miles under the belt and he has plenty more in him!

Frozen Samoa Cookie Pie-4 Frozen Samoa Cookie Pie-5

Frozen Samoa Cookie Pie-6 Frozen Samoa Cookie Pie-7

Tomorrow we are looking at a Mazda CX5 and then next weekend we are going to check out a Toyota Rav4. Price has done endless research on endless models of cars and they are our top 2 cars.

Truthfully, I’m a bit nervous to test drive cars because I’m so used to how mine handles and this time we are going to get an automatic (for various reasons). Aside from rentals, I’ve only ever driven standard cars and when I drive automatics I tend to drive with 2 feet. I’m sure the sales guy is gonna love it…

Frozen Samoa Cookie Pie-8 Frozen Samoa Cookie Pie-9

Frozen Samoa Cookie Pie-10 Frozen Samoa Cookie Pie-11

Anyway, today is Pie Day here on the blog and Pi Day! #doublepieday

So I made this doozy of a pie for the occasion. This Frozen Samoa Cookie Pie is what happens when you stuff some Samoa Cookie pieces in and on a Cool – Whip based pie. And don’t forget the added coconut, caramel, and chocolate that is in and on the pie too!

This takes almost no time to whip up but the killer part is waiting for it to set up and freeze again. But the wait it worth it.

Frozen Samoa Cookie Pie-2

DIG IN!!!

Frozen Samoa Cookie Pie-3

Frozen Samoa Cookie Pie

Makes 9″ pie

Ingredients

  • 1 Nilla Wafer Pre-made Pie Crust
  • 8 oz of cream cheese, at room temperature
  • 1/3 Cup sugar
  • 2 Tablespoons low-fat milk
  • 1 container (8oz) Cool Whip, at room temperature
  • 12 Samoa Cookies, cut into dime sized pieces, divided
  • 1 cup shredded coconut, divided
  • chocolate syrup (about 1/2 cup)
  • caramel sundae syrup (about 1/2 cup)

Process

  1. Whip the cream cheese in a mixing bowl for a few minutes until light and fluffy. Add the sugar and milk and mix until fully incorporated it into cream cheese.
  2. Gently fold in the Cool Whip until it’s well blended together
  3. Put half of the filling mixture into the pie crust. Then put half of the coconut on the filling. Drizzle a lot of the caramel and chocolate sauces on the filling. Lastly, add in half of the cookie pieces.
  4. Pour the rest of the filling mixture on top of the fillings later. Spread evenly with a spatula.
  5. Sprinkle the remaining coconut and cookies on the top of the pie. Gently press into the top of the pie. Then generously drizzle with the caramel and chocolate sauces.
  6. Put the pie into the freezer to set up. I suggest at least 4 hours, but overnight is preferred.
  7. When ready to serve, remove from freezer and cut into all the pieces (8-12). (Cutting the pieces at once when frozen makes it easier to do.) Remove slices from pie plate and let thaw slightly on serving plate.
  8. Serve slices with more caramel and chocolate sauce. And a bit of whipped cream doesn’t hurt.

Inspired by Beyond Frosting

Filed Under: Pies and Tarts, Recipes, Uncategorized Tagged With: a year of pie, caramel, caramel syrup, coconut, frozen pie, Frozen Samoa Cookie Pie, Girl Scout cookies, pie, pies, Samoa Pie

Thin Mint Cookie Pie

February 28, 2014

Thin Mint Cookie Pie

Yay!!! It’s Girl Scout cookie season!

I get Girl Scout cookies every year. Typically I order them from one of my coworker’s daughter but being out on maternity leave I missed my chance to order from her. I was a little afraid that I would totally miss out on the opportunity to get those addictive Girl Scout cookies. But then I saw that a local troop would be setting up a table in my office building. Perfect! So I ran down one day and loaded up on this annual treat.

Thin Mint Cookie Pie-1

Now Girl Scout cookies are great on their own but I’ve learned that you can enjoy them in a variety of ways, including in baked goods, like the Thin Mint Gooey Cake Bars I made last year. How can you go wrong with adding cookies to a dessert? You can’t! It just makes it better.

Thin Mint Cookie Pie-4 Thin Mint Cookie Pie-3

Well, I had a box of Thin Mint cookies staring me down daring me to get to work. I had plenty of things in mind like cookies inside of cookies, cupcakes, and ice cream but ultimately decided to use the Thin Mints in a pie recipe. A minty, chocolaty pie… yes!!

Thin Mint Cookie Pie-5 Thin Mint Cookie Pie-6

This pie uses the Thin Mints in the no bake crust and then the minty chocolate pudding filling is garnished with whole Thin Mints. A whole cookie with each slice!!

This is such a simple pie to whip up. It takes about 20 minutes of active cook time and, thankfully, you don’t dirty many dishes either.

Thin Mint Cookie Pie-7 Thin Mint Cookie Pie-8

Making the pudding filling is very easy but you can’t rush it or neglect it either. If you cook it on too high of a temperature or don’t mix it enough you run the risk of burning the mixture. If you burn it you have to start over again and use some serious elbow grease to scrub your pot. And you don’t want to go that. You want to eat pie.

Thin Mint Cookie Pie-2

Thin Mint Cookie Pie

Makes a 9″ pie, 12 slices

Ingredients

Pie Crust

  • 24 Thin Mint cookies
  • 4 tablespoons butter, melted

Pie Filling

  • 2/3 cup granulated sugar
  • 1/3 cup cornstarch
  • 1/2 teaspoon Kosher salt
  • 4 egg yolks
  • 3 cup milk, any fat content (I used non-fat milk)
  • 2 Tablespoons butter
  • 1 teaspoon peppermint extract
  • 1 3/4 cups dark chocolate chips

To create the pie crust:

  1. Add the Thin Mint cookies to the bowl of a food processor and process until crumbs form.
  2. Add the melted butter, mix well.
  3. Firmly press the cookie crumb mixture into a 9″ pie plate.

To make the pie:

  1. Sift together the sugar, cornstarch, and salt into a 2 quart saucepan.
  2. In a medium sized bowl, combine the egg yolks and milk.  Slowly pour milk mixture into sugar mixture and stir to mix.
  3. Cook the mixture over medium-low heat, stirring constantly, until mixture comes to a low boil.  Continue to stir continually while it cooks for 1 more minute.  Remove from heat and stir in the butter and peppermint extract.  Add the chocolate chips and stir until chips are melted and the mixture is well blended. Let cool for 15-20 minutes, stirring it every 5 minutes.
  4. Pour into the Thin Mint cookie pie shell.  Lightly lay a piece of plastic wrap on top of pie filling before refrigerating for several hours until chilled.
  5. Garnish with 8 Thin Mint cookies around the edge of the pie plate so that each slice would have a cookie.

____________________

Looking for more Girl Scout Cookie Recipes?

Thin Mint Gooey Cake Bars

Samoa Cookie Cocktail

Filed Under: Pies and Tarts, Recipes Tagged With: a year of pie, chocolate, chocolate pie, cookies, Girl Scout cookie, Girl Scout cookies, mint, pie, Thin Mint, Thin Mint cookies, Thin Mint Pir, Thin Mints

Easy Greek Spinach Quiche

February 7, 2014

Inspired by spanakopita, this Easy Greek Spinach Quiche is loaded with spinach and feta. It’s like your taste buds traveled to Greece!

Quiche makes for a wonderful meal you can eat all day long. Enjoy it for breakfast, lunch, or dinner. It’s a versatile meal that is is yummy and adaptable.

…

Read More

Filed Under: Breakfast and Brunch, Meatless Main Dishes, Recipes Tagged With: a year of pie, breakfast, eggs, Feta, feta cheese, Greece, Greek, Greek Quiche, pie, quiche, savory pie, spanakopita, spinach

Chocolate Football Hand Pies

January 31, 2014

Chocolate Football Hand Pies

It’s Friday! It’s Pie Day!

I’m excited for the Superbowl this weekend! Well, I am excited for the food. I’m excited to watch the game but I can’t realistically say I’ll watch the whole thing. Once Autumn falls asleep I’m quick to follow. Gotta maximize on my zzz’s! And there is DVR so we could always finish the game watching at 2am when we typically gets up for another bottle. Oh how things have quickly changed…

Chocolate Football Hand Pies-2 Chocolate Football Hand Pies-3

Chocolate Football Hand Pies-4 Chocolate Football Hand Pies-5

Anyway, I am looking forward to making a batch of Ham and Cheese Sliders to snack on during the all-day coverage. As well, I’m definitely making another (mini) batch of these Chocolate Football Hand Pies.

These are perfect to enjoy during The Big Game! They are hand held, quick to prepare, and a great sweet treat to finish off a day of salt, savory snacks.

Chocolate Football Hand Pies-1

I suggest that you prepare these in the afternoon so that you can just pop them in the oven at half time to enjoy them warm during the second half!

PS- I think these 2 are ready for The Big Game on Sunday! Okay, I just wanted to share some pics! ha!

Autumn 140131

Kemper 140131

Chocolate Football Hand Pies

Makes 12+ servings

Ingredients

  • 2 refrigerated 9″ pie dough sheets
  • 1/4 cup of flour
  • approximately 1 cup of Nutella
  • 1 egg
  • water

Process

  1. Preheat your oven to 350 degrees.
  2. Prepare your egg wash by beating 1 egg with 2 tablespoons of water.
  3. On a floured surface, smooth out the sheets of pie dough. Using a cookie cutter or stencil, cut out the footballs, at least 24.
  4. Lay out half of the footballs on your non stick cookie sheets. Put a generous tablespoon of Nutella in the center of the football. Then put a bit of egg wash along the edges.
  5. Place the top football on the bottom and seal the edges with a fork. Then lightly brush the top with the egg wash and using a knife, gently slice some football laces into the center of the top.
  6. Bake for 12-14 minutes. Remove from baking sheet quickly and enjoy warm!

Filed Under: Pies and Tarts, Recipes Tagged With: a year of pie, hand pie, handpie, handpies, nutella, pie, superbowl

My Chippy Cakey Birthday Pie

January 17, 2014

Chippy Cakey Pie

I am soo sooo sooooo glad it’s Friday. This has been a really long week for me.

On Monday I had a dentist appointment. Not bad but my teeth always hurt for a few days afterwards.

I’ve been sick all week with a cold. Being sick stinks no matter what but with a baby it’s so much worse. I feel extra drained on top of being sick.

Chippy Cakey Pie-01

My mom’s group that I look forward to every Friday afternoon has been canceled with the sudden announcement of the company closing. I’m glad that our group was at least established since we can at least continue to meet on our own but it was nice to have the space and the leadership from the organization.

And then yesterday Autumn was fitted with a hip brace. She was Frank Breech for most of the pregnancy so this effected the positioning of her hips. Autumn had an ultrasound on her hips a few weeks back and it showed the issue but they wanted to see if time would help fix things, unfortunately it didn’t so she got fitted with a brace. She took it like a champ. I, on the other hand, definitely did not. I totally did more crying about it than her.

Chippy Cakey Pie-02

It’s not been a fantastic week for me. Nothing earth shattering but just things that added up to a week that has drained me. So pity party of one.

But it’s Friday so it means one day to the weekend. One more day ’till my birthday!

Okay, I don’t love my birthday but I am looking forward to having Price around for it and for the pizza we make to celebrate it. Here’s to a relaxing snowy pizza filled day.

So, for this week’s pie I decided to make something that would be perfect to serve on a birthday. It would need to have cake it in. And yet also be a pie. Well, after searching Pinterest I found this pie that had cookie dough AND cake in it. And of course was topped with frosting. And sprinkles. WIN!!! 

This recipe uses all store brought ingredients, but you can easily use everything made from scratch. Just do what works for you. No matter what this will be a fun, yummy, unique pie to serve up.

Such a good combination of sweet indulgent things. Totally acceptable for a birthday!!

Chippy Cakey Pie-03

Chippy Cakey Birthday Pie

Makes a 9″ pie and approximately 8 cupcake sized mini pies

Ingredients

  • 1 16.5 oz roll of refrigerated chocolate chip cookie dough, room temperature
  • 1 16.5 oz box of Devil’s Food cake mix with ingredients to prepare it according to package directions
  • 2 refrigerated pie crusts, brought to room temperature
  • 1 can frosting
  • Sprinkles

Process

To make the 9″ pie

  1. Preheat the oven to 350 degrees. Spray a 9″ pie plate and set upon a rimmed baking sheet.
  2. Roll out 1 sheet of pie dough and line the greased pie plate with it.
  3. Flatten the cookie dough into 1/2″ thick layer to fit the bottom of the pie crust. Set aside the extra dough for the mini pies.
  4. Pour the prepared cake batter on top of the cookie dough layer filling the pie crust about 2/3 full to allow for room for the cake to rise. Set aside the remaining batter for the mini pies.
  5. Using a pie shield or foil, gently cover the edges of the pie to prevent them from browning too quickly.
  6. Bake the pie for 30 minutes then remove from the oven, discard the pie shield/foil, and return to the oven for another 15-25 minutes or until the top is set and a toothpick inserted near the center comes out mostly clean. Begin checking the done-ness of your pie at the 30-minute mark, as different types of cake mix may alter the baking time.
  7. Allow the pie to cool completely before frosting and decorating with sprinkles. Cut into wedges to serve and store leftovers airtight at room temperature, up to a day.

To make the mini pies

  1. Spray 8 cavities of a muffin tin.
  2. Roll out 1 sheet of pie dough. Using the rim of a glass or a cookie cutter, cut out 8 circles. Line the greased cavities with the circles.
  3. Flatten the remaining cookie dough into 1/2″ thick layers to fit the bottom of the pie crust.
  4. Pour the remaining prepared cake batter on top of the cookie dough layer filling the pie crusts about 2/3 full to allow for room for the cake to rise.
  5. Bake for 15 minutes or until the top is set and a toothpick inserted near the center comes out mostly clean. Begin checking the done-ness of your pie at the 11 minute mark, as different types of cake mix may alter the baking time.
  6. Allow the mini pies to cool completely before frosting and decorating with sprinkles.

Sourced from The Domestic Rebel

Filed Under: Pies and Tarts, Recipes Tagged With: a year of pie, birthday pie, cake, cake pie, cookie cake pie, cookie dough, frosting, pie, sprinkles

Chocolate Icebox Pie

January 10, 2014

Chocolate Icebox Pie

When I was trying to think of the pie to make for this week I remembered how my best friend made this Chocolate Icebox Pie for their first Thanksgiving in Seattle this year. They enjoyed it so I wanted to give it a try myself.

I’m so glad I did since it was so good!!

I love pies with graham cracker crusts. And obviously a filling made of rich chocolate is gonna find a place into my heart. And stomach.

Chocolate Icebox Pie-03 Chocolate Icebox Pie-02 Chocolate Icebox Pie-04 Chocolate Icebox Pie-05

The pie doesn’t take much time or effort to make so it’s something that you can whip up quickly when you are craving some chocolate. The homemade graham cracker crust is so good but if you’re in a real rush then I’m sure that store-bought one would work as well.

There are not that many ingredients so be sure to use good quality ones, especially the chocolate. As well, if you are melting the chocolate in the microwave, be sure to do it slowly so that you don’t burn it. Burned chocolate makes me sad.

As well, for the crust I strongly suggest putting the cinnamon in as it add a really nice flavor that kicks up the chocolate. And to have a cleanly cut pie, I suggest you cut the pie when it is really cold. This helps get a nice smooth slice and helps the crust stay intact.

Chocolate Icebox Pie-06 Chocolate Icebox Pie-07 Chocolate Icebox Pie-08 Chocolate Icebox Pie-09 Chocolate Icebox Pie-10 Chocolate Icebox Pie-11

This is the kind of pie that is perfect to enjoy after dinner (or maybe before!) or to take to a dinner party. It is simple to make and would be a crowd-pleaser. It makes 8 generous slices but it is so so rich that I could easily see it being cut into 16 thin slices.

This was the first time I made an icebox pie and it won’t be my last. There are so many different varieties that I have plenty to pick from as well. 🙂

Chocolate Icebox Pie-01

Chocolate Icebox Pie

Makes a 9″ pie

Ingredients

Crust

  • 1 1/4 cups finely crushed graham cracker crumbs
  • 1/4 cup sugar
  • 1/2 teaspoon cinnamon, optional
  • 5 tablespoons unsalted butter, melted

Filling

  • 1/3 cup hot water
  • 2 tablespoons Double-Dutch Dark Cocoa
  • 1 tablespoon vanilla extract
  • 1 1/3 cups bittersweet chocolate chips, chunks, or disks
  • 1 1/2 cups heavy cream
  • 1 tablespoon granulated sugar
  • 1/8 teaspoon salt

Garnish, optional

  • Whipped cream
  • Chocolate shavings

Process

To make the crust:

  1. Preheat your oven to 375 degrees.
  2. Combine the ingredients, and press the mixture into the bottom and up the sides a lightly greased 9″ pie pan.
  3. Freeze the crust for 15 minutes (which will prevent over-browning).
  4. Bake for 8-10 minutes, until it’s lightly browned around the edges. Remove from the oven and cool completely.

To make the filling:

  1. In a small bowl, combine the hot water, cocoa, and vanilla extract and set aside. 
  2. Melt the bittersweet chocolate in a microwave or in a double-boiler. Stir the cocoa mixture into the melted chocolate, it will resemble a pudding when completely incorporated.
  3. Whip the cream, sugar, and salt with a hand or stand mixer until soft peaks form.
  4. Gently fold the chocolate mixture into the whipped cream with a whisk or rubber spatula until no white streaks remain. 
  5. Spread the pie filling evenly into the cooled graham cracker crust.
  6. Refrigerate the pie for at least 1 hour before serving, or until the filling is set and firm.
  7. Garnish with whipped cream and chocolate shavings prior to serving.

Sourced from King Arthur Flour

Filed Under: Pies and Tarts, Recipes Tagged With: a year of pie, chocolate, chocolate icebox pie, chocolate pie, icebox pie, King Arthur Flour, King Arthur Flour Recipe, pie

  • « Go to Previous Page
  • Go to page 1
  • Go to page 2
  • Go to page 3

Primary Sidebar

EMAIL NEWSLETTER!

Sign up HERE for meal planning suggestions & tips to take a great trip!

Top Posts & Pages

  • Chocolate Chip Pudding Cookies
    Chocolate Chip Pudding Cookies
  • Easy Pepperoni Pizza Roll Ups
    Easy Pepperoni Pizza Roll Ups
  • New Haven Style White Clam Pizza
    New Haven Style White Clam Pizza
  • Halloween Dessert Charcuterie Board
    Halloween Dessert Charcuterie Board
  • Room Review: Cars Family Suite in Disney World's Art of Animation Resort
    Room Review: Cars Family Suite in Disney World's Art of Animation Resort
  • Meghan Markle's Zucchini Pasta Sauce
    Meghan Markle's Zucchini Pasta Sauce
  • Southwest Orzo Salad with a Cilantro Lime Vinaigrette
    Southwest Orzo Salad with a Cilantro Lime Vinaigrette
  • Lemony Raspberry Zucchini Bread with a Lemony Glaze
    Lemony Raspberry Zucchini Bread with a Lemony Glaze
  • Easy Dutch Apple Pie Cheesecake
    Easy Dutch Apple Pie Cheesecake
  • The Ultimate Weekend Away Packing List for Babies and Toddlers
    The Ultimate Weekend Away Packing List for Babies and Toddlers
collage of recipes of common ingredients
collage of soup stew and chilis bowls

Follow Us

Copyright© 2023 · Brunch Pro Theme by Feast Design Co.


Loading Comments...
 

You must be logged in to post a comment.