• Skip to main content
  • Skip to primary sidebar

I am a Honey Bee

All about my adventures with cooking, crafts, and travel

  • Home
  • About
    • About Me!
    • Press
    • Privacy Policy & Disclosures
    • Contact
  • Recipe Index
  • Exploring
    • Exploring- Florida
    • Exploring- Boston
    • Exploring- Cruises
    • Exploring- New England
    • Exploring- New York City
  • Resources
  • Disney Fun!

Recipes

S’mores Campfire Banana Boats

August 22, 2012

S'mores Banana Boats

When I was growing up I used to go to sleep away camp at Camp Hazen in central Connecticut.

I have some of my best memories from the fun times I had during the 30 weeks I spent at camp over 5 years. It was such a blast with swimming, horse back riding (the horse I rode was named Cadallic), playing rounds and rounds of the cup game in the mess hall, eating fresh baked bread, and staying up way too late.

S'mores Banana Boats-01

I won’t even get into the time my friend and I got in trouble for dying our hair there… obviously I would get in trouble for that!

Endless amounts of fun, which was often focused around the campfire singing J J Coolay and doing skits.

S'mores Banana Boats-02

Other great things to do around a campfire is to roast marshmallows, make s’mores, ‘bake’ orange cakes, and make campfire banana splits. So I combined s’mores and campfire banana splits to make these s’mores campfire banana splits.

S'mores Banana Boats-05 S'mores Banana Boats-06

S'mores Banana Boats-07 S'mores Banana Boats-08

Sadly, I was not sitting on a log around a campfire when I made these S’mores Campfire Banana Splits. I made these in the oven but you can easily make them on your grill after dinner as well.

S'mores Banana Boats-03

They are so simple but so good. Which is perfect for the kid in all of us.

Be sure to stop by Amanda’s blog to check out her S’mores Cheesecake Bars as we continue our S’mores Week!!

S'mores Banana Boats-04

S’mores Campfire Banana Boats

Makes 2

Ingredients

  • 2 bananas
  • 2 fudge covered graham crackers
  • 2 dozen mini marshmallows

Process

  1. Preheat oven or grill to 425 degrees. Prepare 2 pieces of aluminum foil (approx 12″x12″) by spraying with cooking spray.
  2. Slice each banana peel length wise. Carefully open the banana peel and slice the banana diagonially and lenthwise. Spread out the banana with your knife.
  3. Stuff broken peices of 1 graham cracker and a dozen mini marshmallows in each banana.
  4. Bake for 12-14 minutes or until the marshmallows have melted. Carefully unwrap and enjoy!!

____________________

S’mores Week 2012!!

Day 1

S’mores Chex Mix and S’mores Ice Cream Sandwiches

Day 2

S’mores Truffles and Microwave S’more Turtles

Filed Under: Banana, Fruit Desserts, Recipes Tagged With: banana, camp, Camp Hazen YMCA, campfire banana spilt, campfires, chocolate, graham crackers, s'mores, S'mores Campfire Banana Splits, s'mores week

Mini Creamsicle Cheesecakes with Creamsicle Oreo Cookie Crusts

August 14, 2012

Today is National Creamsicle Day. I love creamsicles just as much as I love these wacky holidays. I used to go to the Jersey Shore when I was growing up and I loved going on the boardwalk and having a creamsicle soft serve ice cream. Hot day, fun boardwalk, and a yummy ice cream… perfection at the shore.


So when I saw the limited edition Oreo Creamsicle Cookies recently I immediately tossed them in my basket. They are a vanilla cookie with an orange flavored cream filling. I knew that I would love dunking them in some milk and just eating them as well as making mini cheesecakes with them.


These mini cheesecakes are easy to whip up which is perfect since I have been so busy all summer that making something complicated is a big deterrent. Plus turning on the oven on a hot summer night for a long perod of time is just not going to happen. So these just take 15 minutes to prepare and 15 minutes to bake so I can totally deal with that. The end result is a cute marbled cheesecake that

Mini Creamsicle Cheesecakes with Creamsicle Oreo Cookie Crusts

Serves 12

Ingredients

  • 12 ounces (1 1/2 packages) cream cheese, at room temperature
  • 1/2 cup sugar
  • 1/4 teaspoon salt
  • 1 teaspoon orange extract
  • 2 eggs, at room temperature
  • 1/2 cup plain yogurt
  • red and yellow food coloring
  • 12 Oreo Creamsicle Cookies

Process

  1.  Preheat the oven to 325. Line a 12-muffin pan with cupcake liners and then place 1 Oreo Creamsicle Cookie in each liner.
  2. Using a hand mixer or stand mixer, beat cream cheese until creamy. Gradually add the sugar, salt, and orange extract; beat well. Add eggs one  at a time, mixing just until blended. Stir in yogurt until the cheesecake filling is evenly mixed.
  3. Remove a 1/2 cup of the cheescake filling and set aside in a bowl. Add 1 drop red and 3 drops yellow to the filling and mix until the color is even.
  4. Evenly divide the batter into liners, then add the orange colored filling among the cheesecakes. Using a toothpick swirl the cheesecake batters together for a marbled effect.
  5. Bake for 15 minutes or until tops of cheesecakes are puffed and only slightly jiggly in the very center. Cool to room temperature and then refrigerate for at least a couple hours, preferably overnight, until serving.


Check out my other Mini Cheesecakes!

Mini Cheesecakes with an Oreo Crust

Mini Pumpkin Cheesecakes with an Oreo Cookie Crust

Filed Under: Cakes and Cupcakes, Recipes Tagged With: cream cheese, Creamsicle Mini Creamsicle Oreo Cookie Crusts, Creamsicle Oreo, mini, mini cheesecake, National Creamsicle Day, Oreo, Oreo cookies, yogurt

Tropical Pork Pineapple Kebabs- SRC

July 30, 2012

Another month is wrapping up so it means it is Secret Recipe Club time! How is this summer flying by?!?! It is crazy! At least it has been jam packed with great food, lots of fun with family and friends, and some awesome adventures. It just makes me wish summer was so much longer.


This time I had the blog called Without Adornment by Bean. The blog is packed full of gluten free recipes, as well as other allergen free recipes. This is perfect for someone with allergies, as well as anyone who just likes great food. I immediately saw her Tropical Pork Pineapple Kebabs and knew they would be perfect for a satisfying summertime dinner.


The original recipe was just a guide with the ingredients, and not the amounts used. I generally cook that way so I liked that there was freedom to have my own stamp on this recipe. I added some soy sauce to the marinade just so it would not be too sweet for my liking. I also had zucchini in the fridge so I added that to the kebabs too. I served this with some rice that I prepared while Price grilled up the kebabs. Totally loving our new grill, this summer, and this recipe!

Beans recipe was gluten free which I respect because for a while last year I ate gluten free and enjoyed the process and felt better from it. Anyway, I did add the soy sauce for flavor but it does wheat so if you want this to be gluten free just be sure to use a gluten free soy sauce. Or you can use Worcestershire Sauce which is naturally gluten free instead of the soy sauce and has 80% less sodium than soy sauce.

Tropical Pork Pineapple Kebabs

Serves 4

Ingredients

For Kebabs

  • 1 pound of pork tenderloin cut into 1″ cubes
  • pineapple cut into 1″ cube pieces, approximately half a pineapple
  • 1 red pepper, cut into 1″ x 1″ pieces
  • 1 zucchini, sliced into 1/4″ thick pieces
  • 8 oz whole white button mushrooms

For Marinade

  • 1/4 cup soy sauce
  • 1/4 cup pineapple juice
  • 2 gloves garlic, crushed
  • 1 teaspoon chili garlic sauce, known as sambal
  • 1 cup of diced pineapple
  • 1 tablespoon of brown sugar
  • 1/2 teaspoon of white pepper

Process

  1. Soak 10 wooden skewers for at least an hour before using them.
  2. Prepare the marinade first by combine all of the marinade in a bowl or large plastic bag. Mix thoroughly and then add the pork pieces to the marinade. Store in the refrigerator while the meat marinates for at least 1 hour minutes.
  3. Once skewers are soaked and the meat is marinated, thread the pork, pineapple, pepper, zucchini, and mushrooms. Repeat the series twice and end with a piece of pork.
  4. Grill the kebabs over medium-high heat. Using a basting brush, brush the kebabs with the marinade each time you turn the kebabs grilling each side.
  5. Cook the kebabs until done with an internal temperature of the pork is 145 degrees. Let rest for about 5 minutes before serving.

____________________

Secret Recipe Club

Check out my previous Secret Recipe Club Posts:

June: Cheesy Garlic Knots

May: Berry Brownie Torte

April: Peanut Butter Cup Ice Cream

March: Sauteed Green Beans with Lemon and Almonds

February: Fried Pickles

Jan: No SRC postings

December: Shrimp Sriracha Stir Fry

November: Vegetable Enchiladas

October: Pumpkin Cheesecake Bars

Check out the rest of the reveal day posts!


____________________

Thanks for visiting. Please leave me a comment to provide some feedback. I appreciate all the comments I receive.

Filed Under: Meat, Recipes, Summer BBQ Tagged With: gluten free, grill, grilling, kabob, Kebab, mushrooms, pineapple, pork, pork kebabs, recipe, red peppers, Secret Recipe Club, shish kebabs, soy sauce, soy suace, SRC, Tropical Pork Pineapple Kebabs, without adornment, zucchini

Baked S’mores Bars

July 26, 2012

Baked S'mores Bars

So I don’t really like S’mores.

Don’t hate me!!!!

Baked S'mores Bars-01

I could never understand why people liked s’mores when I was growing up. Sure I ate them as I just didn’t want to be that kid but I just didn’t get what they liked. Crisp crackery cookie. Hard chocolate. Marshmallow. And another crisp cookie. I love toasting marshmallows but the rest of it didn’t really work for me over time.

Also, I like graham cracker but I like the Honey Maid Grahams Cinnamon Crackers the best. They are sugary and extra cinnamon-y… but do you think they were ever brought along for camp fires… that would be a n-o. I always felt there was so much potential for s’mores but I didn’t know what it was… until now that is!

Baked S'mores Bars-02

I saw that Amanda recently posted a recipe for baked s’mores. The moment I saw them I knew that I had to make them. HAD TO! This was exactly what I have always been hoping for from a s’more. A soft, crumbly texture instead of a crisp cookie. Ooey gooey melted chocolate. Tons of marshmallow goodness. It was all the great flavors of a s’more but in the texture of a blondie. I could stand behind that.

Baked S'mores Bars-5 Baked S'mores Bars-6

These were so simple to whip up that you can make these for yourself or for your kids when they are dying to a s’more but you aren’t camping.

Baked S'mores Bars-7 Baked S'mores Bars-8

Baked S'mores Bars-9 Baked S'mores Bars-10

Baked S'mores Bars-11 Baked S'mores Bars-12

I used Hershey bars for this but if you didn’t have them on hand and really really wanted these bars then just used chocolate chips. Milk chocolate chips would be better than semi-sweet chocolate chips but chocolate is chocolate so get on with your bad self and make these dang Baked S’mores Bars!!!

I’ve made these several times now and I have to say that the more fluff the better! Make sure you at least use 2 Cups. But if you want to use a bit more, you won’t be mad.

Baked S'mores Bars-13 Baked S'mores Bars-14

The top will crack when you bake it but it’s okay. I swear. It’s doesn’t have to be super pretty like a cheesecake, but keep this in mind. If you are really upset about cracks then poke the top with a tooth pick a few times before baking to help reduce the cracking.

I do think it would be pretty cool to make these with some winter time indoor camping. Oh so you didn’t do indoor camping growing up? What about bring a pool (no water) into the house to watch the movie Mermaids with your mom? No… just me then. Well, I suggest you give it a try and sing and dance along to this song.

Baked S'mores Bars-03

I think you should totally have an indoors camping adventure!! It will put you in a good mood. I swear. Just like I swear that you have to make these s’mores bars!

When it comes to making these Baked S’mores Bars… be prepared to eat a lot of them.

Baked S'mores Bars-04

Baked S’mores Bars

Serves 16

Ingredients

  • 1/2 cup unsalted butter, room temperature
  • 1/4 cup brown sugar
  • 1/2 cup sugar
  • 1 large egg
  • 1 teaspoon vanilla
  • 1 1/3 cups all purpose flour
  • 3/4 cup graham cracker crumbs
  • 1/4 teaspoon salt
  • 1 teaspoon baking powder
  • approx. 10 oz of Hershey’s chocolate bars ( I used 6 1.55oz bars)
  • 2 cups marshmallow fluff

Process

  1. Preheat oven to 350F. Prepare an 8×8-inch baking pan with parchment paper or aluminum foil and spray with cooking oil (optional).
  2. Cream together the butter and sugars until light and fluffy. Add the egg and vanilla until incorporated.
  3. Sift together flour, graham cracker crumbs, baking powder, and salt. Add the dry ingredient mixture to the butter mixture and mix at a low speed until just combined.
  4. Divide dough in half. Press one half into an even layer on the bottom of prepared pan. Evenly arrange the chocolate bars on top of the dough.
  5. Spread marshmallow fluff evenly over the chocolate layer. Or put into a large plastic storage bag, cut the tip off & pipe on for easy distribution.
  6. On a floured surface, roll out the remaining dough, forming a piece that is just large enough to fit in the 8×8-inch pan. Place dough on top of marshmallow fluff and press down slightly.
  7. Bake for 30 to 35 minutes, until golden brown. Cool slightly before cutting with a sharp knife into 16 even pieces. Wipe knife between cuts w a wet towel to make the process easier.

Filed Under: Cookies, Bars, and Candy, Recipes Tagged With: baked s'mores, chocolate, fluff, Marshmallow, s'mores, s'mores bars

Honeydew Melon Sorbet

July 17, 2012

When I was growing up I would remember my dad eating melons (typically cantalope and honeydew) at night. He would cut them and throughout the week would eat the pieces slowly, one at a time, with a toothpick while watching TV. I think that has led to my love of melons, specifically honeydew melons.


Since it has a roasty, toasty summer I have been trying to keep cool all the time so that I don’t hate my favorite season. I sure would love to eat ice cream all the time but that is just not going to happen so I have been loving mixing up sorbets. My newest favorite is honeydew sorbet. Bliss on a hot, steamy night.


Honeydew melon sorbet lets the flavors of the honeydew melon shine through. The simple syrup just sweetens and brightens up the natural flavors. I like to add a bit of lime or lemon to mellow out that sweetness and enhance the flavors as well, similar to adding a bit of salt to a tomato. It just works! To keep with the citrus flavors, I like to garnish the melon with a bit of lemon verbena instead of mint. Dig in and cool off!

Honeydew Melon Sorbet

serves 4

Ingredients

  • 1 cup of simple syrup
  • approximately 1/2 a honeydew melon, depending on size
  • juice of 1 lime

Process

  1. Cut the honeydew into small pieces. Blend the honeydew until it a very smooth consisency. Blend the melon until you have 3 cups of puree.
  2. Add the simple syrup and juice of the lime to the3 cups of puree and blend to combine the ingredients.
  3. Chill the mixture for at least 30 minutes.
  4. Pour the honeydew puree mixture into your frozen ice cream make bowl and follow your ice cream maker’s directions to process the sorbet.

Check out my other sorbet recipes!

Raspberry Sorbet

Watermelon Sorbet

____________________

Thanks for visiting. Please leave me a comment to provide some feedback. I appreciate all the comments I receive. 

Filed Under: Frozen Desserts, Recipes Tagged With: frozen, frozen treat, fruit sorbet, honeydew, honeydew sorbet, lemon verbena, lime, melon, melons, simple syrup, sorbet

Dinner in 20: Pasta with Veggies and Cream Sauce

June 28, 2012

I have not been the mood to do anything lately. Well, that is not true. I want to scrapbook all day, every day. I just don’t feel right not being able to be creative. Thinking about how far behind I am working on Project Life makes me want to break out in hives. I left off at week 12… it is now week 26. kill me. And no, I don’t have to continue, but I want to. When I work at it I feel good, I really enjoy it. So I just need to get set up for it, and find some time, and I’ll feel like myself again.


Being so disinterested in cooking I have been gravitating towards quick fix dinners. Salads have been gracing our table a lot lately but this Pasta with Veggies and Cream Sauce dish was a big winner. I had just restocked the fridge and pantry from moving so I didn’t have to run out last minute to grab something. I love when that happens. I also love Philadelphia Cooking Cream. We use a lot of this to add to pasta dishes, casseroles, or on eggs. It adds a lot of flavor to dishes easily. I’m not singing their praises because they are sponsoring me, I just really like the cooking creams. Man I would love to be sponsored by them, that would be so cool since we go through so much of this stuff. Ha!

Pasta with Veggies and Cream Sauce

Serves 6

Ingredients

  • 1 lb farfalle pasta
  • 1 tablespoon extra virgin olive oil
  • 1 red bell pepper, sliced into 1″ pieces
  • 1 lb mushrooms, sliced
  • 1 (10oz) Philadelphia Italian Cheese and Herb Cooking Cream
  • 1 bunch scallions

Process

  1. Bring a large pot of water to a boil. Add the pasta and cook according to directions for al dente pasta.
  2. While the pasta is cooking, saute the red pepper and mushrooms together in the olive oil. Cook until the vegetables are tender.
  3. Add the cooking cream to the vegetables and mix together until fully incorporated.
  4. Add the cooking cream onto the pasta when you serve it.

____________________

Thanks for visiting. Please leave me a comment to provide some feedback. I appreciate all the comments I receive. 

Filed Under: Recipes, Rice, Pasta, and Grains Tagged With: cooking cream, cream cause, dinner, mushrooms, pasta, pasta vegetarian, philly cooking cream, red peppers, scallions, vegetables, vegetarian

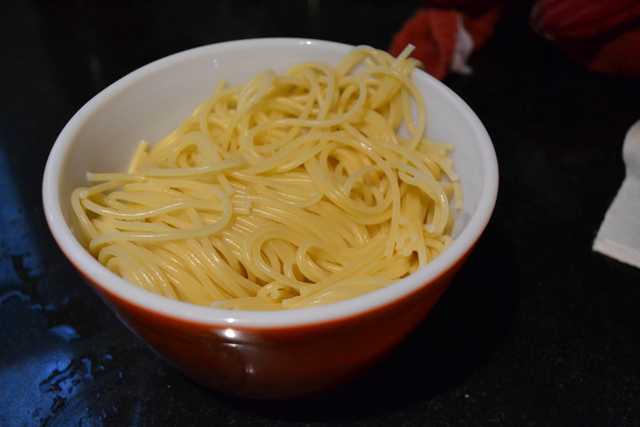
Garlic Butter Noodles with Scallions and Sambal

June 18, 2012

When the cat’s away the mice will play.  Or in this case, when Price is away, Nicole will eat garlic noodles. And Price was just in Vegas for a guys trip so I obviously made these!


Years ago I saw a post on White on Rice Couple for Garlic Butter Noodles. They were sharing a recipe they adapted from Jaden’s new The Steamy Kitchen Cookbook. Umm, big whoop! I’m Italian so I grew up on pasta with butter and a bit of garlic. Well, shutthefrontdoor this is totally different and amazing. I knew I would have to immediately make this recipe. The noodles, garlic, butter, some sugar, and fish sauce were all calling out to me.


I was hooked from the start. Price, not so much. So this is now a dish that I make when he is working late or away. When he works late the second he opens the door he exclaims ‘YOU MADE GARLIC NOODLES!!! NOOOOO!!!” Why does he protest so much? Because no matter how many times I brush my teeth I still stink of garlic. I don’t mind but I’m not on other end of it. So you have been warned, but I swear it is worth it.

The combination of the butter, garlic, and brown sugar is out of this world. The garlic is slowly cooked in the butter just enough to bring out the flavors. (Don’t burn it! If you do,  start over!) Then when you add the brown sugar it becomes caramel-y  with the butter. That alone is great but then you add the fish sauce and soy sauce and the whole thing get a 1-2 punch with umami flavors. The scallions are a nice touch for flavor and texture. I add the sambal bajak for some some heat and spice, which I can’t get enough of in this. The recipe is quick, addicting, and will be a favorite in no time!

Garlic Butter Noodles with Scallions and Sambal

serves 1

Ingredients

  • 4-6 oz spaghetti pasta
  • 3 garlic cloves, finely minced
  • 2 tablespoons butter
  • 2 tablespoons brown sugar
  • 1 tablespoon fish sauce
  • 1 tablespoon soy sauce
  • 1/4 cup chopped scallions
  • 1-2 tablespoons of sambal bajak

Process

  1. Bring water to a boil in a medium size pot. Cook the pasta until al dente. Before straining set aside a 1/4 cup of pasta water.
  2. In the empty pot that you cooked the pasta in, melt the butter over medium- low heat. Add the garlic. Stir constantly to prevent the garlic from burning. Once the garlic is golden brown add the brown sugar in. Constantly mix the sugar until is starts to bubble.  Add the fish sauce, soy sauce, and pasta water. Turn up the heat to cook until it just comes to a boil. Remove from the heat.
  3. Add the pasta back to the pot with the scallions and mix until all the noodles are evenly coated. Enjoy with some sambal bajak (and a breath mint!)

What do you make when your significant other is away? Seafood? Wine and cereal? Dinner becomes eating cake while standing over the sink. 

____________________

Thanks for visiting. Please leave me a comment to provide some feedback. I appreciate all the comments I receive. 

Filed Under: Recipes, Rice, Pasta, and Grains Tagged With: brown sugar, dinner, fish sauce, food, garlic, Garlic Butter Noodles, Garlic Butter Noodles Steamy Kitchen, Jaden Steamy Kitchen, sambal, sambal bajak, soy sauce, spaghetti, spaghetti pasta, Steamy Kitchen, White on Rice Couple

Berry Brownie Torte

May 28, 2012

This Berry Brownie Torte is a perfect treat for Memorial Day & Fourth of July BBQ’s, or any of your fun summer gatherings. Everyone will love this treat!

We are still getting settled into our new home. This process feels so slow.

Well, it is slow going since I am so slow at unpacking and I want everything to be in its final home when I unpack it, not unpack, move, move again, and move once more. So a little bit of everything is everywhere.

…

Read More

Filed Under: Fruit Desserts, Recipes Tagged With: berry brownie torte, Berry Torte, brownie torte, Fourth of July dessert, Memorial Day, Memorial Day dessert, Secret Recipe Club, SRC, Troyer's Loving Life

Potato, Bacon, and Blue Cheese Spinach Salad with Warm Mustard and Shallot Dressing

May 7, 2012

I love a good challenge. I love to try something new in the process as well. Well, that is exactly what happened when I saw a mustard contest on the Stonewall Kitchen blog. Stonewall Kitchen specializes in various jams, jellies, and mustards, as well as gift box collections and kitchen wares. They were looking for bloggers to create recipes using their mustards. After browsing their mustard varieties I decided on their Blue Cheese Herb Mustard.


 The package from Stonewall Kitchen arrived at work and I started to tell my coworkers about the mustard and the recipe contest. I was asking around for their ideas and one of my coworkers suggested a potato salad. That intrigued me because I began to wonder how I could create a recipe around that idea. Would it be mayo based? Would it be vinegar based like German Potato Salad? The more I thought I about it I decided to use that term ‘potato salad’ loosely and develop a salad with potatoes. To tie the Blue Cheese Herb Mustard into the dish would use it in the dressing and use blue cheese in the salad as well. And of course I would have to add bacon so it, because what good salad doesn’t have bacon?


The salad is hearty enough to be a whole entrée. The potatoes are flavored from the bacon fat and are crunchy adding a nice element of texture to the salad. The bacon of course adds a great texture to the salad, but it also adds a nice flavor component to it as well. The combination of the bacon and blue cheese reminded me of a burger which tricks the mind into thinking this is filling meal from a salad. The warm dressing is very flavorful with the shallots and the mustard in the vinegar dressing. I didn’t add oil to the dressing because the bacon adds fat to the dish and the shallots were cooked in olive oil. The warm dressing wilts the spinach greens so this dish should be assembled right before serving.


Potato, Bacon, and Blue Cheese Spinach Salad with Warm Mustard and Shallot Dressing

serves 4

Ingredients

  • 7 oz bag of baby spinach
  • 1 1/2 pounds of small potatoes (such as Trader Joes’ teeny tiny potatoes)
  • 1/4 pound thick cut bacon (approximately 4 slices)
  • 2 large shallots
  • 2 tablespoons olive oil
  • 1/4 cup red wine
  • 4 tablespoons Blue Cheese Herb Mustard
  • 1/4 cup red wine vinegar
  • 2 garlic cloves, minced
  • 1/2 teaspoon red pepper flake
  • salt and pepper
  • 4 oz of crumbled blue cheese

Process

  1. Rinse the baby spinach and set aside in a large bowl.
  2. Rinse and halve the potatoes. In a medium pot, bring water to a boil. Add the potatoes and cook until fork tender. Strain the potatoes and set aside.
  3. Cut bacon into small pieces and cook in a large skillet on medium-low heat until the bacon is cooked thru. Set aside on paper towels. Drain off the bacon fat reserving 2 tablespoons in the skillet.
  4. Turn up the heat for the skillet to medium-high and add the potatoes. Let sides of the potatoes to crisp up before stirring them. Make sure each potato is crisp before removing them from the skillet and setting aside on a plate.
  5. Thinly slice the shallots. Gently cook the shallots on medium-low heat in the skillet with 2 tablespoons olive oil. Once the onions are softened and golden brown, add in the wine and 2 tablespoons of mustard. Mix together until the mustard is incorporated into the wine and shallots.
  6. While the shallots are cooking, mix together the vinegar, garlic, remaining 2 tablespoons mustard, red pepper flake, and salt and pepper in a medium size bowl. When the shallots are done add them to the dressing in the bowl.
  7. It is now time to assemble the salad. Gently toss the dressing into the salad. Layer the potatoes, blue cheese, and bacon on the salad.

As part of entering this Stonewall Kitchen Mustard Contest I received a complimentary jar of mustard to use in creating a recipe.

____________________

Thanks for visiting. Please leave me a comment to provide some feedback. I appreciate all the comments I receive. 

Filed Under: Recipes, Salads Tagged With: baby spinach, bacon, blue cheese, contest, mustard, salad, spinach salad, stonewall kitchen, stonewall kitchen mustard, stonewall kitchen mustard contest

Garlic Lemon Shrimp

May 3, 2012

When Price and I first met ages ago he did not like seafood. At all. Well, with the exception of the fried fish dinner from Doug’s Fish Fry from back home. And I think that was only because they have the best cole slaw there. Over the years he has been more adventitious and has expanded his pallet so every now and then we had seafood for dinner.  Shrimp was on sale one day so whipped up this super simple, flavorful dinner for us on a whim.


This was so easy to prepare. The prep time was so fast as most of the work was done for me has the shrimp had been de-veined and de-shelled. I only needed to remove the tails before tossing together the rest of the mixture. This could be served with rice or pasta but I decided to not dirty another pot and just enjoy it with french bread. Normally, I would drizzle the bread with extra virgin olive oil but the rest of the dish was so indulgent with butter, oil, and wine so I keep it basic. Besides, the bread would just be dipped into the ‘broth’ anyway. This is very garlicky so this is not a first date kind of meal, enjoy it with someone you love and some wine!


Garlic Lemon Shrimp

Serves 2 as an entree, 4 as an appetizer

Ingredients

  •  1 pound shrimp, medium sized (31-35)
  • 4-6 cloves of garlic, crushed
  • 2 tablespoons of butter, cut into small pieces
  • 2 tablespoons of extra virgin olive oil
  • 1/4 cup white wine
  • 1/2 teaspoon dried oregano
  • 1 teaspoon crushed red pepper
  • 1 1/2 large lemons
  • salt and pepper
  • 1 loaf of french bread

Process

  1. Preheat oven to 425. Line a large rimmed baking sheet with aluminum foil.
  2. Rinse and remove the shell and tails from the shrimp.
  3. In a bowl, mix together the shrimp, garlic, butter, olive oil, wine, oregano, red pepper flake, and the juice of 1 lemon. Sprinkle with salt and pepper.
  4. Lay out the shrimp mixture on half of the lined baking sheet. Cut the remaining 1/2 lemon into thin slices and lay onto the shrimp.
  5. Slice the french bread into 1/2 thick pieces and lay out on the other half of the baking sheet.
  6. Bake for 12-15 minutes, it is done when the shrimp have all turned pink.
  7. First remove the toasted bread, then carefully pick up the aluminium foil to transfer the shrimp and it’s cooking liquid to a serving dish.

Filed Under: Fish and Shellfish, Recipes Tagged With: Cooking, dinner, garlic, garlic lemon shrimp, Lemon, seafood, shrimp, white wine

Peanut Butter Cup Peanut Butter Ice Cream

April 30, 2012

PEANUT BUTTER CUP PEANUT BUTTER ICE CREAM

post from 4/30/12, pictures updated 7/6/17

What a crazy month!

April has been crazy for us with procedures to buy our first house. It’s been very exciting and stressful… so many phone calls, emails, and things to do! Crazy!

Peanut Butter Cup Peanut Butter Ice Cream_01

Well, that is exactly why I picked this recipe from A Cook’s Quest for this month’s Secret Recipe Club posting. I loved flipping through all the recipe filled pages debating over different things to make but I kept going back to doing this amazing ice cream.

When I saw the recipe for Peanut Butter Cup Ice Cream I knew that I had to do it. It would be super simple but so intense.

PEANUT BUTTER CUP PEANUT BUTTER ICE CREAM

And that is what we needed this month considering everything going on. Sometimes a big bowl of ice cream helps melt away all the stress.

It would be the perfect sweet treat to enjoy to end the month. Plus, it would give the ice cream maker a bit of work before being packed up for a bit.


This is one the creamiest ice creams I ever made. The high fat content from the peanut butter and that fact that everything is mixed so thoroughly really made this so smooth and creamy.

Peanut Butter Cup Peanut Butter Ice Cream_03

Plus, who can resist the combination of chocolate and peanut butter!?

I found the recipe really easy to make and would definitely make it again and again!

Peanut Butter Cup Peanut Butter Ice Cream_04

Peanut Butter Cup Ice Cream

Serves 8 (1/2 cup portions)

Ingredients

  • 1 1/2 Cups smooth peanut butter
  • 3/4 Cup sugar
  • 2 Cups 2% milk (alt, 1 Cup skim milk,  1 Cup whole milk)
  • 1 1/4 Cups heavy whipping cream
  • 8 ounces of mini peanut butter cups (alt, chop up regular or miniture sized cups)

Process

  1. To create the ice cream base, use a mixer to combine the peanut butter and sugar until smooth.
  2. Slowly add in the milk and mix until all the sugar is dissolved, approximately 2 full minutes. Add the heavy cream, beat until well combined and smooth.
  3. Refrigerate at least 1 hour to chill the mixture. Freeze the mini peanut butter cups.
  4. After the ice cream base as chilled, follow your ice cream makers directions to process the ice cream.
  5. When you ice cream is done, mix in the frozen peanut butter cups.
  6. Transfer to a storage container. Ensure the peanut butter cups are well mixed throughout.
  7. You can enjoy the ice cream now with a soft-serve consistency at this point.  Or you can let it chill again, for a least another hour to set up

 ____________________


Post contains affiliate links

 ____________________

Check out my previous Secret Recipe Club Posts:

March: Sauteed Green Beans with Lemon and Almonds

February: Fried Pickles

December: Shrimp Sriracha Stir Fry

November: Vegetable Enchiladas

October: Pumpkin Cheesecake Bars

Check out the rest of the reveal day posts!


____________________

Thanks for visiting. Please leave me a comment to provide some feedback. I appreciate all the comments I receive. 


Filed Under: Frozen Desserts, Recipes Tagged With: frozen dessert, ice cream, peanut butter, peanut butter cup ice cream, peanut butter cups, peanut butter ice cream, Secret Recipe Club

Beef and Mushroom Hot Pot

April 24, 2012

I love my slow cooker. It has been there to pull me out of some tough weeks when I don’t have the time to cook but don’t want to get take out. I realized that I was neglecting it this year so I pulled out the Semi-Homemade Slow Cooker Recipes 2 and went right to a recipe I had bookmarked for a while now. I was always drawn to it because it was affordable, quick, and flavorful… sign me up!


I really enjoyed this slow cooker meal. I know I’ll make it again because it was so flavorful and was so simple. I made some changes to the recipe to suit out palate and what we had on hand. For example, since we always have carrots around I used fresh instead of the frozen as specified. My advice for the recipe to come out well is use low-sodium beef broth and to not cook it for too long.  The broth concentrates so it would be way too salty if you use regular broth. Because of my schedule I actually had to cook it for 10 hours. I wish I could simply tell work I need to leave early to manage me slow cooker… imagine! ha! The rice was a bit gummy/mushy at the bottom. It didn’t ruin the meal at all but just something I noticed comparing the rice at the top verse the rice at the bottom.


Beef and Mushroom Hot Pot

Serves 6

Ingredients

  • 2 tablespoons Dijon mustard
  • 2 tablespoons Worcestershire sauce
  • 2 pounds stew meat, cut into small pieces
  • 1 pound of mushrooms, sliced (2 80z packages)
  • 4 carrots, cleaned and sliced into 1/4″ thick rounds
  • 1 box (6 oz) of wild rice blend
  • 2 14 oz cans of low sodium beef broth
  • 1 tablespoon ground black pepper

Process

  1. In a small bowl combine the Dijon mustard and Worcestershire sauce. Mix together well and set aside.
  2. In a 5-6 quart slow cooker, combine all of the ingredients together.
  3. Set slow cooker for 6-8 hours.
  4. Mix halfway through, if the mixtures looks like it is drying out or too soft in areas.
  5. Enjoy!

Filed Under: Meat, Recipes Tagged With: beef, carrot, crock pot, dijon mustard, dinner, food, hot pot, low sodium, mushrooms, Sandra Lee, slow cooker, slow cooker recipes, stew, stew meat, wild rice

  • « Go to Previous Page
  • Go to page 1
  • Interim pages omitted …
  • Go to page 47
  • Go to page 48
  • Go to page 49
  • Go to page 50
  • Go to page 51
  • Interim pages omitted …
  • Go to page 56
  • Go to Next Page »

Primary Sidebar

EMAIL NEWSLETTER!

Sign up HERE for meal planning suggestions & tips to take a great trip!

Top Posts & Pages

  • Chocolate Chip Pudding Cookies
    Chocolate Chip Pudding Cookies
  • Room Review: Cars Family Suite in Disney World's Art of Animation Resort
    Room Review: Cars Family Suite in Disney World's Art of Animation Resort
  • New Haven Style White Clam Pizza
    New Haven Style White Clam Pizza
  • Easy Pepperoni Pizza Roll Ups
    Easy Pepperoni Pizza Roll Ups
  • Quick and Easy Cabbage Slaw
    Quick and Easy Cabbage Slaw
  • 15+ Tips & Tricks for Enjoying Mickey's Not So Scary Halloween Party
    15+ Tips & Tricks for Enjoying Mickey's Not So Scary Halloween Party
  • Quick Oatmeal Cookie Apple Crisps
    Quick Oatmeal Cookie Apple Crisps
  • Lemony Raspberry Zucchini Bread with a Lemony Glaze
    Lemony Raspberry Zucchini Bread with a Lemony Glaze
  • Peanut Butter Lovers Snack Mix
    Peanut Butter Lovers Snack Mix
  • Baked Rice Pudding Using Leftover Rice
    Baked Rice Pudding Using Leftover Rice
collage of recipes of common ingredients
collage of soup stew and chilis bowls

Follow Us

Copyright© 2026 · Brunch Pro Theme by Feast Design Co.

Loading Comments...

You must be logged in to post a comment.