• Skip to main content
  • Skip to primary sidebar

I am a Honey Bee

All about my adventures with cooking, crafts, and travel

  • Home
  • About
    • About Me!
    • Press
    • Privacy Policy & Disclosures
    • Contact
  • Recipe Index
  • Exploring
    • Exploring- Florida
    • Exploring- Boston
    • Exploring- Cruises
    • Exploring- New England
    • Exploring- New York City
  • Resources
  • Disney Fun!

Uncategorized

Cheesy Garlic Knots- SRC

June 25, 2012

For this month’s Secret Recipe Club I was given Suma Rowjee’s blog called Cakes and More. As usual I forwarded this info on to Price for him to pick out the recipe that I should make. I was happy that he went through her extensive recipe index consisting of breads, cakes, cookies, and many, many vegetarian dishes and picked out the garlic knots. We love garlic bread so I think that is made him pick out the garlic knots.


I’m glad he picked out that recipe since it was so easy. Which was great since I waited ’till the last minute, as usual, & started the dough last night! Ha! I made the knots this morning… Yummy breakfast! (I made Price some scrambled egg whites to go with it!) really, no matter when you eat these you will love them. Light, fluffy rolls with tons of garlic flavor. I added cheese to them before baking, because I just couldn’t resist!

I’m quite intimidated when it comes to making bread. I know I shouldn’t be but I don’t work with yeast often so I get a little nervous about it. But Suma had great instructions & a quick tweet to Amanda helped make things painless!


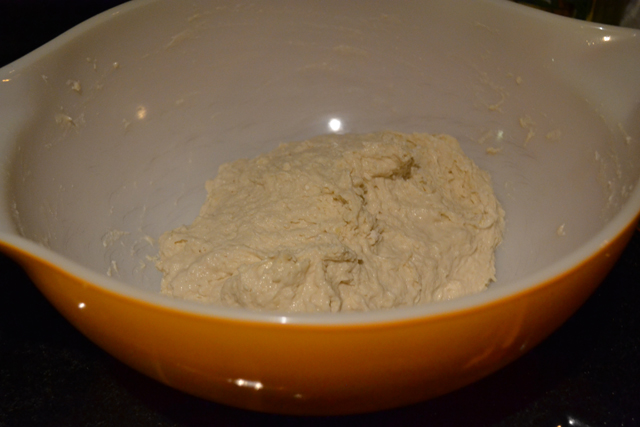
The dough was so easy to work with, in fact I did not knead the dough at all. I just worked the dough with an oiled rubber spoon for a while & it came together easily. With that I didn’t have to get my hands & counter super dirty then. I only worked the dough when I was forming the knots & that was easy with a bit of flour on the counter & my hands. Forming the knots was quick work and became intuitive quickly. The result was a garlicky knot that I would serve with dinner without a lot of fuss!


Cheesy Garlic Knots

makes 12 knots

Ingredients

For the dough:

  • 1 cup plus 2 tbsp. lukewarm water (110-115 degrees)
  • 1 tbsp. sugar
  • 1 package of instant yeast
  • 2 tbsp. olive oil
  • ¼ cup milk, lukewarm
  • 3 cups all purpose flour
  • 1¼ tsp. salt
For the garlic glaze:
  • 4 tbsp. melted butter
  • 2 cloves garlic, minced
  • 1 pinch of black pepper
  • 1 pinch of red pepper flake
  • 1 pinch of oregano
  • grated Parmesan cheese

Process

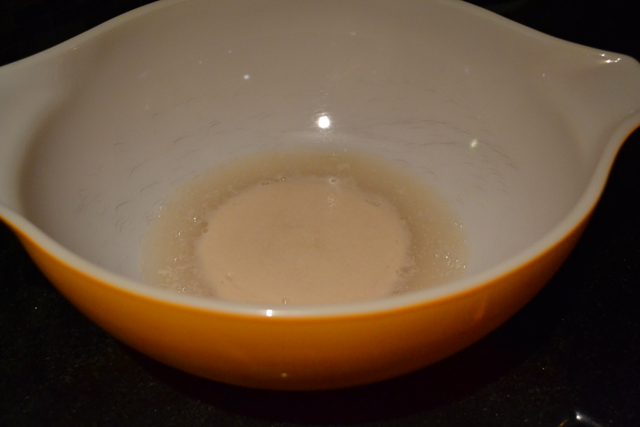
  1. Combine the water and sugar in a large bowl, add the yeast to proof.
  2. Once the yeast has proofed add the oil, milk, flour, and salt to the bowl. Using a large spoon to mix all the ingredients together. Mix with the spoon or knead for 10 minutes. Oil the bowl thoroughly, return the dough to bowl with a kitchen towel and let double in size. The first rise will take approximately 1 hour.
  3. Divide the dough into 12 balls by dividing the dough in half, then half again. Take each of those 4 sections and divide it into 3, resulting in 12 equally sized balls.
  4. To create the knot, take one dough ball and roll it out to 10″ long strip on a floured surface. At 40% through the strip bend the strip so the 60% portion is looped over the point where your started to bend the strip. Loop the loose end through the newly created center, then tuck that end under the outer loop. The remaining tail gets flipped over the loop and tucked into the center hole. Place on a greased baking sheet. Repeat for all knots.
  5. Cover the knots on the baking sheets with a kitchen towel to let them rise again for another hour.
  6. When you are ready to bake the knots, preheat the oven to 350 degrees. Also prepare the glaze by combining all of the glaze ingredients, except the cheese. Brush the glaze on each knot, sprinkle a little bit of cheese on the glazed knots.
  7. Bake the knots for 11-13 minutes, or until they cheese is golden brown.

____________________

Secret Recipe Club

Check out my previous Secret Recipe Club Posts:

May: Berry Brownie Torte

April: Peanut Butter Cup Ice Cream

March: Sauteed Green Beans with Lemon and Almonds

February: Fried Pickles

Jan: No SRC postings

December: Shrimp Sriracha Stir Fry

November: Vegetable Enchiladas

October: Pumpkin Cheesecake Bars

Check out the rest of the reveal day posts!


____________________

Thanks for visiting. Please leave me a comment to provide some feedback. I appreciate all the comments I receive.

Filed Under: Uncategorized Tagged With: bread, garlic, garlic knots, knot bread, rolls, Secret Recipe Club, SRC, yeast, yeast rise

Sugar Cookie Bars

May 15, 2012

I feel that the blog-osphere blew up this spring since just about everywhere I looked I saw sugar cookie bars. Same goes for pinterest… sugar cookie bars all over the place. Well, I figured I would join in on the fun and make some. Once I made them I kept asking myself why I didn’t make them sooner!!


I made a batch for the general contractors working on the project that is keeping me so busy at work. I’m busy but they are slammed working on the project. They have to take turns working on Saturdays supervising the work that is underway as well as the normal M-F 10hr days. Which is exactly why I brought these babies in to them one Saturday morning. I then heard the following Monday how they were flying off the carrier that I carried them in on. Thankfully everyone really enjoyed them 🙂


I used the sugar cookie bar recipe from Kita’s blog Pass The Sushi. I made some adjustments because I didn’t have a lemon so I didn’t use the lemon zest that original recipe called for and I think that the bars didn’t hurt from it. Once I had it all laid out I realized that I didn’t have that large of a baking sheet for the cookie bars. I used a 9×13 lined pan and just adjusted the length of baking. The hardest part is knowing then they are done as they are still very soft in the middle. Once I tested the cookies with a small knife and it was clean upon removal I took them out to cool. I suggest that you wait for them to cool for a few hours or over night, which will help them set up in the center and prevent the frosting from melting when put on the bars. I had some melting as I was rushing because I was making them at 6am to delivery around 8.30… learn from my foolish goofs!

Sugar Cookie Bars

-Serves 32-

Ingredients:

For the cookie bars:

  • 5 cups flour
  • 1 teaspoon salt
  • 1/2 teaspoon baking soda
  • 2 sticks of room temperature unsalted butter
  • 2 cups sugar
  • 4 large eggs
  • 2 teaspoon vanilla extract

For the frosting:

  • 2 sticks of room temperature unsalted butter
  • 1 teaspoon vanilla extract
  • 1/4 teaspoon salt
  • 4 cups confectioners’ sugar
  • 3-5 tablespoons milk
  • Food coloring gel
  • Sprinkles

Process:

  1. Preheat the oven to 350 degrees F and line a large metal pan (9″x13″) with aluminum foil or parchment paper and grease.
  2. In a medium bowl, whisk together the flour, salt, and baking soda. Set aside.
  3. Beat the butter and sugar until light and fluffy. Add the vanilla extract and the eggs one at a time. Mix until fully incorporated, scraping down the sides as needed. Add the flour mixture a little at a time until just combined.
  4. Using your hands or a greased flat bottomed glass, press the cookie mixture into the baking pan. Bake for 20-25 minutes, until light golden brown and when a knife tip is inserted in the center it is clean upon removal. Gently lift out the cookie bars from the pan and cool completely on a wire rack.
  5. To make the frosting: Cream together the butter until smooth. Add the vanilla extract and salt to the mixture. Slowly add the confectioners’ sugar until the frosting is smooth. Add the gel food coloring until the desired color is reached. Add the milk in 1 tablespoon at a time to create a smooth texture.
  6. Evenly spread the frosting over the cool sugar cookie bars and add sprinkles. Cut into even sized bars.

____________________

Thanks for visiting. Please leave me a comment to provide some feedback. I appreciate all the comments I receive. 

Filed Under: Uncategorized Tagged With: butter, cookie, frosting, pass the sushi, sprinkles, sugar, sugar cookie bars, sugar cookies

Breakfast Burritos

May 11, 2012


One of my favorite things about the weekend is that we can enjoy a leisurely breakfast together. Our Saturday’s are typically crazy so we really savor our Sunday mornings. The paper comes and that is the day when we make breakfast. Before we had a coffee maker Price would leave to get coffees while I cooked. Before we had a coffee maker, Price would leave to get coffees while I cooked. He would come back with a massive hot coffee for himself and a massive iced coffee for me. Now that we have a coffee maker we make breakfast together (if I can pry him away from Sports Center) and sip mugs of hot coffee all morning while we go through the paper. Clearly, we are 80 years old deep down…


This breakfast came together rather quickly as I had thought about it the night before. We were making dinner and having baked potatoes with it and figured I would throw a few extra potatoes on the baking sheet to use for breakfast hash. Well, when the time came to make breakfast, we decided that breakfast burritos would be fun so we whipped them up quickly.

It is a quick breakfast that only really dirties 1 skillet. The hardest part is not to fill your burrito too much. If that just happens, then grab a fork and take a bit off the top so you can roll your burrito! I would have preferred to have black beans in my burrito, but didn’t feel like opening a can for just a bit of beans so I opted out. We enjoyed these because they were so good, simple, and filling. Plus, they are a great way of using up large burrito or sandwich wraps at the end of a week.


Breakfast Burritos

serves 4

Ingredients

  • 4 slices of bacon
  • 2 baked potatoes, chopped
  • 1/2 white onion, sliced
  • 3 tablespoons taco seasoning mix
  • 2 tablespoons water
  • 8 eggs: 4 whole eggs, 4 egg whites
  • 4 burrito tortilla wraps
  • 1 cup of shredded cheese, such as chedder or montery jack
  • 1 large tomato or 1/2 cup salsa
  • 1 cup sour cream
  • sliced pickled jalapenos and black olives, optional

Process

  1. Cook the bacon in a large skillet over medium heat. When done, reserve 2 tablespoons bacon drippings in the skillet and set aside on paper towel lined dish.
  2. In the same skillet add the onion and potatoes. When they have browned, add in the taco seasoning and water to the skillet. Gently mix
  3. While the potatoes and onions are cooking, beat together the eggs in a large bowl.
  4. Once the potatoes and onions have adsorbed the water, push the mixture to one side and add the eggs to the other side of the skillet. Scramble the eggs together with a rubber spatula as they cook. As the eggs begin to set, combine the eggs with the potato and onions. Continue to gently cook on low until done.
  5. Assemble the burritos but laying out a burrito tortilla on your work surface. Add 1/4 of the egg mixture to the 1 side of the burrito. Break 1 strip of bacon apart in half an place on the eggs. Add the your desired toppings, such as the tomatoes and cheese.
  6. To wrap the burrito, fold over the short ends of the wrap. Your burrito is now longer than it is wide. Begin to roll the end with the mixture over, while keeping the sides in, until you have completely rolled the entire burrito together.
  7. In a large skillet or grill pan on medium-high, place your burritos flap side down so the flap will seal closed. Flip over once to allow the other side to crisp as well. If you burrito was too full, or if you prefer to not have the burrito warp crisp, then wrap the burrito in aluminum foil to help keep it all together.

____________________

Thanks for visiting. Please leave me a comment to provide some feedback. I appreciate all the comments I receive. 

Filed Under: Uncategorized Tagged With: bacon, breakfast, breakfast burrito, brunch, burritos, eggs, mexican, potatoes, sour cream

Slow Cooker ‘Roast’ Chicken

April 13, 2012

You know when you have one of those moments of “well, like, duh!” because something you never considered before made perfect sense. Why didn’t I think of that moment. Well, that happened to me when I was hopping around on Julie of The Little Kitchen and I saw in her sidebar a recipe for ‘Whole Chicken in a Slow Cooker‘. I kept going “that makes sense! Why haven’t I thought of this? It has to be so good! I have to make it!!”

This was one of the juiciest chickens I have ever had (other was beer can chicken- OMG!). It was so moist, flavorful, and cooked perfectly. Any rub on the chicken would work, even just salt and pepper with some lemons in the mix. This is more about technique, not about the ingredients. Don’t want sweet potatoes- fine… just throw some fingerlings in there. I think the biggest thing to consider is how long to cook it. I would not do this on a week day since I am away from home for 10 hours. This would just fall apart too much then. I suggest this on a nice weekend when you want to relax and do nothing or if you have errands up to your eyeballs and you have no time to cook and just have dinner (almost) appear in front of you.

Slow Cooker ‘Roast’ Chicken

Serves 4

Ingredients

  • 2 onions
  • 2 large sweet potatoes
  • 4-5 carrots
  • 3 1/2 -4 1/2 pound whole roasting/frying chicken
  • Preferred seasoning blend

Process

  1. Remove giblets bag from chicken to discard and rinse entirely. Pat chicken dry completely with paper towels.
  2. Cut all vegetables in large pieces, such as carrots in 2″ long pieces, and the onion in 8 large wedges.
  3. Rub the chicken with your selected rub to completely coat it.
  4. Place onions, carrots and sweet potatoes inside the slow cooker to create a layer on the bottom. Then put chicken on top of the vegetables.
  5. Set slow cooker for 6 hours. Check the internal temperature of the leg, if it is 160 degrees F then it is done. If you used a chicken with a pop up thermometer then remove the chicken when it has popped.
  6. If you crock pot is broiler safe (consult your product information) then put the entire crock pot into the oven for 4-5 minutes. If your crock pot is not broiler safe then carefully remove the chicken and place on a glass baking dish or a large baking sheet. Allow the chicken to rest for 5-10 minutes prior to cutting.

Filed Under: Uncategorized Tagged With: Carrots, chicken, crock pot, dinner, food, frying chicken, Julie The Little Kitchen, Onions, roast chicken, slow cooker, slow cooker chicken, sweet potatoes, The Little Kitchen

Spring Time Bird’s Nest Cookies

April 4, 2012

Easter is my favorite holiday. I don’t go to church so I love everything else that has been slapped onto Easter. Dresses are pretty and frilly. Pastels are everywhere. There are no gifts- except candy. Cute animals decorate everything. I just about *squeee!!!* every time I see a cute little bunny on something. Plus flowers are blooming. I love how (to me) Easter celebrates spring and a new beginning. Everything is shedding winter’s greys and is layering on color. Flowers are starting to bloom everywhere from beneath your feet to above your head from overarching tree branches. And on those branches sit nests that have lovely speckled eggs on them.

These nest cookies are a perfect way to celebrate spring time! They are so easy too! The coconut part is super easy to bring together. The baking time might sound like a long process of checking them every 5 or so minutes or so but it’s just to ensure they will achieve a nice golden brown color while not letting the bottom burn. Other than that it’s super easy and so good. Coconut and chocolate go together so well so it ends up being a perfect pairing.

Spring Time Bird’s Nest Cookies

*makes 15 cookies*

Ingredients

  • 1 14oz package of shredded coconut
  • 1 14 oz can of condensed milk
  • 1 teaspoon vanilla extract
  • 1 stick unsalted butter
  • 1 cup confectioners sugar
  • 2 tablespoons cocoa powder
  • 1 tablespoon vanilla extract
  • 1 tablespoon water
  • 1 bag Cadbury Mini Eggs

Process

  1. Preheat oven to 350. Line baking sheets with aluminum foil or parchment paper
  2. Combine the shredded coconut, condensed milk, and vanilla extract together in a large bowl.
  3. Create 15 mounds of the coconut mixture. Using a spoon or your fingers, create each mound into a bowl shape to resemble a nest.
  4. Bake for 10 minutes, turn the oven down to 325 and bake for 5-8 more minutes, until golden brown. Turn the oven off and then let them sit for another 5 minutes prior to removing from the oven. Gently remove the cookies from the sheet to let them cool.
  5. As the nests are cooling, mix the frosting together. Using a mixer, beat the butter until light and fluffy. Sift the sugar and cocoa powder into the butter and continue mixing. Add vanilla extract and the water and mix until completely incorporated and the frosting is fluffy.
  6. Put the frosting in a small piping bag or a sandiwch bag and cut the tip so you can pipe the frosting onto the coconut nests.
  7. Pipe approximately 1 tablespoon of frosting into the nests. Then place 4 mini eggs into the frosting to secure them into the nests.

Filed Under: Uncategorized Tagged With: bird's nest, Cabdury, cadbury eggs, coconut, cookies, easter, shredded coconut, spring, spring cookies

Mint Oreo Brownies with Mint Buttercream Frosting

March 14, 2012

These right here are going to blow your mind. If you like mint and chocolate I suggest you run to your grocery store and get the few things you need to whip these suckers up. I love the mint and chocolate combination so these were very hard to resist. Thankfully I have an office full of taste testers so I was able get their feedback. I popped these suckers down at a table in the main corridor with a post it note and watched as people walked to the kitchen and stopped to take one, and then on their way back with their coffee they stopped for another sliver. Ohhh trouble!


As lame as it is, I made a resolution this year to enjoy holiday’s more. I have been extra grouchy about holidays and the effort they are so I have been trying to dive into the celebrations more this year. I will have fun damn it! So I am throwing myself at St. Patrick’s Day and all things green with wild abandon this year. So expect a few more St. Patrick’s Day themed recipes and posts leading up to the booze soaked day.

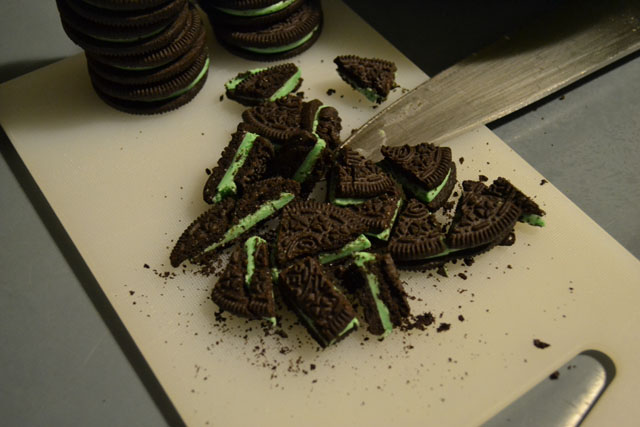
Back to the important things… brownies. The mint Oreos provide a lot of minty flavor, plus they provide a lot of moisture from the cream. I suggest baking them until they are just set so they are super fudgy. The frosting makes the over the top minty. I liked topping the brownies with crushed Oreos so it gave everyone a hint as to what was inside the brownies.

Mint Oreo Brownies with Mint Buttercream Frosting

Makes 16 brownies

Ingredients

For the Brownies:

  • box of fudgy brownies with ingredients to prepare brownies
  • 14 mint Oreos

For the Frosting:

  • 1 stick of unsalted butter, room temperature
  • 1 cup of confectioners sugar, sifted
  • green food coloring
  • 1/4 teaspoon peppermint extract
  • 4 crushed Oreos for garnish

Process

  1. Preheat your oven to 350 and grease a 9×9 pan.
  2. Crush the 14 mint Oreos for the brownies.
  3. Prepare the brownie mix according to the directions on the box. Just prior to mixing complete, add in the Oreo cookie pieces and gently mix in.
  4. Bake the brownies according to the box, start checking at the minimum time and remove once a tooth pick in clean upon insertion and removal.
  5. Prepare the frosting by beating the butter until light and fluffy. Add in green food coloring, start with 12 drops and continue until the preferred shade of green is achieved. Add the peppermint extract and mix thoroughly. Lastly, slowly add the confectioners sugar and beat until the frosting is formed and is fluffy.
  6. Once the brownies have cooled completely, add frosting the top of the brownies. Garnish with crushed Oreo pieces.

Filed Under: Uncategorized Tagged With: brownies, chocolate, green, mint, mint Oreo brownies, mint oreos, oreos, st patricks day

Party Pico de Gallo

January 31, 2012

Price and I recently had a party at our place for my birthday. It was centered around a Mexican theme so I’ll be posting a few recipes from that that works well for a fiesta or just a great gathering. Enjoy!

Pico de Gallo is one of my favorite things to have on hand for topping on our dinners because it’s a great addition to chicken, steak, pork, or even a salad. But I really love to share at a party. Chips and dip are classic party foods and there is a great reason for it. They are filling, great finger foods, and can be centrally located on a coffee table while people are gathered around.

I much prefer poco de gallo over a jarred salsa. There is no comparison really. Pico de gallo has such a fresh, vibrant taste from all the fresh vegetables in the mix. The lime juice really helps all the flavors intensify as well. I feel that little home made touches like this really make a meal so much people. Also when you serve this to guests they notice the homemade touch.

With the Super Bowl coming up this weekend this would be great to throw together for the big game, but really making a big batch works well for any sporting event or gathering, especially Cinco De Mayo. I suggest serving it with some tortilla chips, corn chips, pita chips, or celery at your next party.

Party Sized Pico de Gallo

Serves 20-25 people

Ingredients

  • 4 pounds of Roma tomatoes
  • 2 large red onions
  • 4-6 cloves minced garlic
  • 5-6 jalapeños
  • large handful (approximately half a bunch) of cilantro
  • juice of 2 limes
  • salt and pepper

Process

  1. Dice both onions and put into a large bowl.
  2. Remove the tops of the tomatoes. Halve the tomatoes length wise, halve again. Remove the seeds by sliding you knife along the inner membrane. Cut the flesh into long strips and the run your knife through the strips for a small dice. Add tomatoes to the onions.
  3. Add the garlic.
  4. Mince the jalapeños by cutting off their tops, halving them, removing the seeds (optional), and running your knife along the pieces until they are uniformly small. Add to the mixture in the bowl.
  5. Take your fresh cilantro and evenly chop the pieces, stems included. Add to the mixture.
  6. Squeeze 2 limes over the mixture. Gently mix the pico de gallo.
  7. Add salt and pepper to taste. Give another quick toss to incorporate.

Filed Under: Uncategorized Tagged With: cilantro, dip, fiesta, garlic, jalapeno, lime, mexican, Onions, party, pico de gallo, salsa, tomatoes

Cinnamon M&M Oatmeal Cookies

December 30, 2011

This was the first year I noticed that M&M’s had some great holiday themed candies. I picked up a few bags of each, including mint M&M’s, which I used in my Chocolate Chocolate Mint Cookies. They were a hit with the contractors for my project, so I decided that I should give cookie making a try again with another kind of M&M’s. I gravitated to the cinnamon M&M’s and decided that an oatmeal cookie would work well.


I started the journey of making these cookies by pulling out several cook books looking for an oatmeal cookie base that could be used with the cinnamon M&M’s. In the end, tweeting what I was doing ending out being fruitful since Rachel (Baked by Rachel) tweeted me back saying she had some great oatmeal cookie recipes on her blog. One being a crisp oatmeal cookie and another being a softer, chewier oatmeal cookie. I was looking for a chewy cookie so I went with the recipe on her blog. Perfect choice!


The cookie is soft, chewy and has nice cinnamony, chocolately pieces that dot throughout the cookie. The cinnamon flavor in the M&M is subtle but adds a nice touch to the cookie. I think the 1 bag is enough for the batch of cookies, but I can’t help but think that adding another 1/2 bag or so could not hurt!


I really enjoyed working with these M&M’s and I imagine that other’s did too since there is a Cinnamon M&M’s facebook page! I hope that you had a chance to try these since they are so good. I just grabbed a few more bags of these at Target for 30% off since it’s post Christmas. If you can’t find these still in stores then you should do a bit of googling for them. One place I found them was on The Candyland Store. I certainly hope they bring them back next year!

Cinnamon M&M Oatmeal Cookies

*makes approximately 3 dozen*

Ingredients

  • 2 sticks of unsalted butter
  • 1/2 cup of sugar
  • 2/3 cup of light brown sugar
  • 2 eggs
  • 1 teaspoon salt
  • 1 teaspoon baking soda
  • 2 cups flour
  • 1/2 teaspoon cinnamon
  • 2 1/4 cups quick cooking oats
  • 2 tablespoons milk
  • 2 teaspoons vanilla extract
  • 1 9.9 oz of bag of cinnamon M&M’s

Process

  1. Preheat oven to 350 degrees. Grease cookie sheets.
  2. In a large mixing owl or stand mixer, cream the butter and sugars together.
  3. Add the eggs and beat until incorporated. Scrape the sides of the bowl down to evenly mix together.
  4. Add the salt, baking soda, flour, and cinnamon into the mixture and beat until fully incorporated.
  5. Gently mix in the oatmeal, milk, and vanilla extract. Again, scrape down the sides to ensure all the mixture is coming together evenly.
  6. By hand, mix in the M&M’s into the cookie dough.
  7. Using 2 spoons, scoop out heaping tablespoons onto the baking sheet. Do not crowd the cookies together.
  8. Bake for 11-13 minutes, depending on the size of the cookie, or until the cookie is set up in the center. Let cookie sit on the cookie sheet for 3 minutes prior to removing to fully cool.

Filed Under: Uncategorized Tagged With: Baking, cinnamon, cookies, m&m's, oatmeal, oatmeal cookies

Biscoff Muddy Buddies

December 27, 2011

I like taking challenges and suggestions when I am cooking and baking. I like to ask people what they think of what I made- texture, flavor, density, etc- and I like to take ideas from other sources, like blogs, newspapers, magazines, and other foodies. I feel that is the only way you can grow and have fun.

A simple tweet from Julia of Fat Girl Trapped in a Skinny Body prompted this recipe creation. She pondered of anyone had made Muddy Buddies with Biscoff spread. Biscoff is a cookie based spread- imagine if you took tea biscuits and made a spread out of it. I thought it was an interesting idea so I just had to give it a try. How would a chex mixed snack that is predominantly peanut butter be when you take away the peanut butter and use Biscoff?


It will be so amazing!!! I ate way to much of it the day I made it. Thankfully, I had the intention of gifting it so I packaged the rest up and that stopped me from eating it all. I was happy to make this since our neighbor’s son is allergic to nuts so I could give some to them since I removed the peanut butter for the Biscoff spread. (Now, keep in mind that this now is no longer gluten free.) I had to make some changes to the original Muddy Buddies recipe to accommodate the ingredient substitution. I reduced the amount chocolate because Biscoff is not as intense as peanut butter and I didn’t want the chocolate to overtake it. I think there was a good balance to it in the end.

Biscoff Muddy Buddies

makes 18 servings

Ingredients

  • 9 cups Corn or Rice Chex (or Combination)
  • 3/4 cup semi sweet chocolate chips
  • 1 cup of Biscoff cookie spread
  • 1/4 cup butter
  • 1 teaspoon vanilla extract
  • 1 1/2 – 2 cups powdered sugar

Process

  1. Put the chex cereal in a large bowl or on a large sheet tray.
  2. In a small sauce pan combine the chocolate chips, Biscoff spread, butter, and vanilla extract. Over low heat combine all the ingredients as the chocolate chips and butter melt. The end consistency should be smooth and lump free.
  3. Pour the mixture over chex cereal. Mix to coat all pieces evenly.
  4. Let cool 10 minutes and then sift powdered sugar over the coated chex. Coat all pieces evenly as well. Let cool completely prior to bagging.

Filed Under: Uncategorized Tagged With: Biscoff, Biscoff Muddy Buddies, Chex, chocolate, Muddy Buddies, Nut Free

Chocolate Chocolate Mint Cookies

December 20, 2011

During some recent shopping trips, I have come across M&M’s holiday flavored candies. I picked up all the varieties I saw and started to look up different recipes that I could use with the M&M’s candies. So far my favorites are the cheery cordials to eat and the mint to bake with, but i’m just getting started.


One of my coworkers makes the most unbelievable chocolate chocolate chip cookies. I decided that I would make something similar but instead of loading it up with chocolate chips I would add in the mint m&m’s. Having made chocolate chocolate chip cookies in the past I decided that could wing it and see how it would come out. The first time worked out well but I did not add any chocolate chips, only the m&m’s and I didn’t feel that was enough so I made them again and added in some chips. Much better! I love the mint and chocolate combo so these cookies are ones I would actually eat. I ate 2- very usual for me!


Chocolate Chocolate Mint Cookies

*makes 2 dozen 2 1/2″ cookies*

Ingredients

  • 2 1/2 Cup all purpose flour
  • 1 teaspoon salt
  • 1 teaspoon backing soda
  • 1/2 cup cocoa powder
  • 1 cup (2 sticks) unsalted butter, room temperature
  • 1 cup sugar
  • 1 cup brown sugar
  • 2 eggs beaten
  • 1 teaspoon vanilla extract
  • 1 cup of semi sweet chocolate chips
  • 1 9.9 oz bag of mint m&m’s

Process Ingredients

  1. Preheat oven to 375 and line cookie sheets with parchment paper.
  2. Wisk the flour, salt, baking soda, and cocoa powder in a bowl to combine. Set aside.
  3. Combine the butter and sugars in bowl and beat until light and fluffy.
  4. Add the eggs and vanilla extract to the sugar mixture and beat until combined.
  5. Add the dry ingredients to the bowl and mix until a dough as formed.
  6. Once the dough has combined add in the chocolate chips and continue to mix.
  7. Using a spoon, gently mix in the m&m’s until evenly combined.
  8. Scoop the dough out and mix into 1 1/4″ balls by hand.
  9. Place the balls on the cookie sheets with plenty of room to allow spread.
  10. Bake for 10-12 minutes. Remove cookie sheets from oven when the center of the cookie is still soft to the touch. Let cool and set up for 5 minutes on the cookie sheet prior to removing.

Filed Under: Uncategorized Tagged With: chocolate, chocolate chip, Christmas, cookies, holidays, m&m's, mint, mint m&m's

Big Blue Cocktail

December 11, 2011

I live in the land of Patriots. But I am not a fan of these Patriots. No, I am sticking to my roots and I get flack for it up here. But I grin and bear it since I can always fall back on this game, this play. Bliss.

I am a Giants fan. I grew up in the tri-state area so they were always on in my house. I would cheer when I had no idea what was going on just to join in. I wore my dad’s oversized shirts to bed. Now, I have my own Giants shirts that I wear during games. (My brother has a Giants tattoo on his leg… now that is commitment!) I know they are having a rough season right now. But I’m not a fair weather fan! I am still cheering them on. Maybe those cheers are peppered with foul language but still I’m stinking to my men in blue. Especially after they were robbed last week with a bad call. I know they have it in them.

I had recently been going through old magazines and pulling out recipes. One was a really old issue of the defunct Blueprint Magazine. (Oh, how I miss that magazine.) I came across a Blueprint Martini on one of the pages and I knew I would have to make to enjoy while cheering on the G-Men. I made the cocktail form the magazine and it was just too much! Shocker here- I don’t like drinking straight vodka. Sure I’ll do a shot but this recipe called for 4 oz of it. I would have been on the floor! So I ended up reworking it and making it delightful! Now if only the Giants had won that game I would have been so happy. Let’s hope they beat the Cowboys today!

Big Blue Cocktail

*makes 1 cocktail*

Ingredients

  • 1 oz of vodka
  • 1 oz of Curaçao liqueur
  • 1 tablespoon of triple sec
  • 4 oz of seltzer
  • garnish with blueberries

Process

  1. Put the vodka, Curaçao, and triple sec together in a chilled cocktail shaker, and mix to combine.
  2. Pour the seltzer in a martini glass and then add the contents from the cocktail shaker.
  3. Garnish with blueberries.

Filed Under: Uncategorized Tagged With: blueberries, blueprint cocktail, blueprint martini, cocktail, curacao, giants football, triple sec

Lemon Ginger Marmalade

December 6, 2011

In keeping with the random things that Emily and I do, we spent last Saturday making and canning jam. Last years adventure was so much fun and successful that we decided to make another day of it and make more jam to gift for our families and friends.


We set out looking up different recipes to try, so a flurry of emails went back and forth deciding which ones sounded best. In the end we settled on 3 jams, one of which was Lemon Ginger Marmalade from The Bitten Word (originally from the Ball Complete Book of Home Preserving) I had made marmalade previously but was not satisfied with the results. Trying a new recipe was really interesting for me then.


When making this jam, keep the following in mind- the ginger will take a very, very long time to grate. Do this step first. Be patient and it will be worth it. While a cup of ginger appears to be a lot, it does mellow out as it cooks. You notice the ginger when you first smell the jam. As you take a bit of it you really notice that just casts a light flavor to the Meyer lemons, which seems to get you as it lingers. The resulting jam is the perfect combination of being fragrant, sweet, tart, and smooth. It is a great accompaniment to a sugary pastry.


Lemon Ginger Marmalade

-makes 7 jars-

Ingredients

  • 7 small Meyer lemons (or regular lemons)
  • 1/2 teaspoon baking soda
  • 2 1/2 cups water
  • 1 cup coarsely grated ginger root (suggestion: purchase 1 pound)
  • 1 package (1.75 ounce) regular powdered fruit pectin
  • 6 1/2 cups granulated sugar

Process

  1. Prepare jars, and lids in dishwasher or in boiling water. Fill canning pot with enough water to completely cover the jars when processing.
  2. Peel the ginger and then grate 1 cup, set aside.
  3.  Remove yellow lemon peel in long strips with a vegetable peeler. Dice the pieces, set aside.
  4. Over a bowl, remove the pith from the lemons and then supreme the lemons, be separating the fruit from the membranes. Squeeze the left over membranes into the bowl to collect as much juice as possible. Measure 1 cup of the lemon segments and juice, and set aside.
  5. In a large deep stainless steel saucepan, combine the diced lemon peel, baking soda, and water. Bring the mixture to a boil over high heat. Once boiling, reduce heat, cover, and boil gently for 5 minutes to soften the peel. Remove from heat for 5 minutes.
  6. Add the grated ginger, lemon segments, and pectin to the pot with the peel mixture. Wisk the mixture over medium heat until the pectin is dissolved. While wisking, bring the mixture to a boil over high heat. Add the sugar all at once and bring back to a rolling boil, stirring constantly. Once the jam has boiled hard for 1 full minute, remove from heat and skim off any foam.
  7. Using a funnel and ladle, add the hot marmalade into hot jars, but leave 1/4-inch headspace. Remove air bubbles with a bubble remover, as needed. Wipe the rims with a wet towel. Place the lid on the jars and gently the band on, just until resistance is met, then increase to fingertip-tight.
  8. Process the jars in a canner, ensuring they are completely covered with water. Bring to a boil and process for 10 minutes. Remove from water, set upon a towel covered surface. Jars will pop when process correctly, this time can vary from a 1 minute our of the water to several hours.

Filed Under: Uncategorized Tagged With: Canning, gingr, jam, Lemon, lemon ginger marmalade, marmalade, The Nutmeg Polymath

  • « Go to Previous Page
  • Go to page 1
  • Interim pages omitted …
  • Go to page 7
  • Go to page 8
  • Go to page 9
  • Go to page 10
  • Go to page 11
  • Go to page 12
  • Go to Next Page »

Primary Sidebar

EMAIL NEWSLETTER!

Sign up HERE for meal planning suggestions & tips to take a great trip!

Top Posts & Pages

  • Chocolate Chip Pudding Cookies
    Chocolate Chip Pudding Cookies
  • Easy Pepperoni Pizza Roll Ups
    Easy Pepperoni Pizza Roll Ups
  • Room Review: Cars Family Suite in Disney World's Art of Animation Resort
    Room Review: Cars Family Suite in Disney World's Art of Animation Resort
  • Quick and Easy Cabbage Slaw
    Quick and Easy Cabbage Slaw
  • New Haven Style White Clam Pizza
    New Haven Style White Clam Pizza
  • Meghan Markle's Zucchini Pasta Sauce
    Meghan Markle's Zucchini Pasta Sauce
  • Baked Rice Pudding Using Leftover Rice
    Baked Rice Pudding Using Leftover Rice
  • Sauteed Red Wine Garlic Mushrooms
    Sauteed Red Wine Garlic Mushrooms
  • Broccoli Cheddar Soup for Two!
    Broccoli Cheddar Soup for Two!
  • Lemony Raspberry Zucchini Bread with a Lemony Glaze
    Lemony Raspberry Zucchini Bread with a Lemony Glaze
collage of recipes of common ingredients
collage of soup stew and chilis bowls

Follow Us

Copyright© 2026 · Brunch Pro Theme by Feast Design Co.

Loading Comments...

You must be logged in to post a comment.